Whether it's for Halloween or just everyday play, a tail is always lots of fun and not difficult to sew. This tail has a belt so it is independent of any other costume/clothing piece. You can adjust the size to fit your kids or even yourself.
MATERIALS
- fabric (I prefer heavier stuff like fleece, denim, etc.)
- thread
- sewing machine, notions
- tape measure, ruler
- marker
- Velcro
- poly-fill stuffing
1. Cut two triangles of fabric that have two 20" (50 cm) long sides and one 8" (20 cm) short side. You can fold your fabric right sides together and use the folded edge as one of the sides.
2. Sew all three sides (fabric right sides together), leaving a 4" (10 cm) gap on one long side to turn the tail later.
3. Measure around your kid's waist and divide that measurement in half to determine how long you need to make your belt pieces. For my 5 year old, I used two 12" (30 cm) long strips. Cut the strips 3" (7.5 cm) wide, fold in half right sides together width-wise (so it's long and narrow), and sew one end and along the long side (makes a tube with one end closed). Turn right sides out. Top stitch around to help the belt lay flat. Sew a 3" (7.5 cm) piece of Velcro to one side of the stitched/closed end. Repeat for the second strip. (I used a different color fabric for the belt but you can use whatever color you want.)
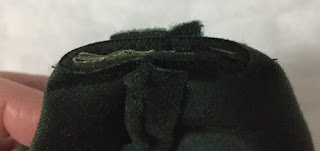
4. This part is a bit tricky. Flatten the short side of the tail (not the pointy end) opposite of the seam, so that the corners become triangles with the seam down the middle. Take the unstitched/open end of one belt strip and tuck it inside the tail and into one of the corner triangles as far as you can. Pin through the triangle to hold the belt strip inside. Draw a line on the tail corner where you can feel the end of belt strip inside. Use the line you made as your guide and sew across the triangle, making sure you sew over the end of the belt inside.
Repeat for the other belt strip, making sure that you have both Velcro sides facing the same way so that they will line up properly once everything is done.
5. Cut the corner triangles off where you drew the guideline earlier.
6. Turn the tail right sides out.
7. Stuff the tail with poly-fill stuffing. The firmer you stuff it, the more the tail will stick out from the wearer's body. Sew the opening closed.
DONE!
Have fun playing dinosaur, dragon, Gekko, lizard, monster...


No comments:
Post a Comment