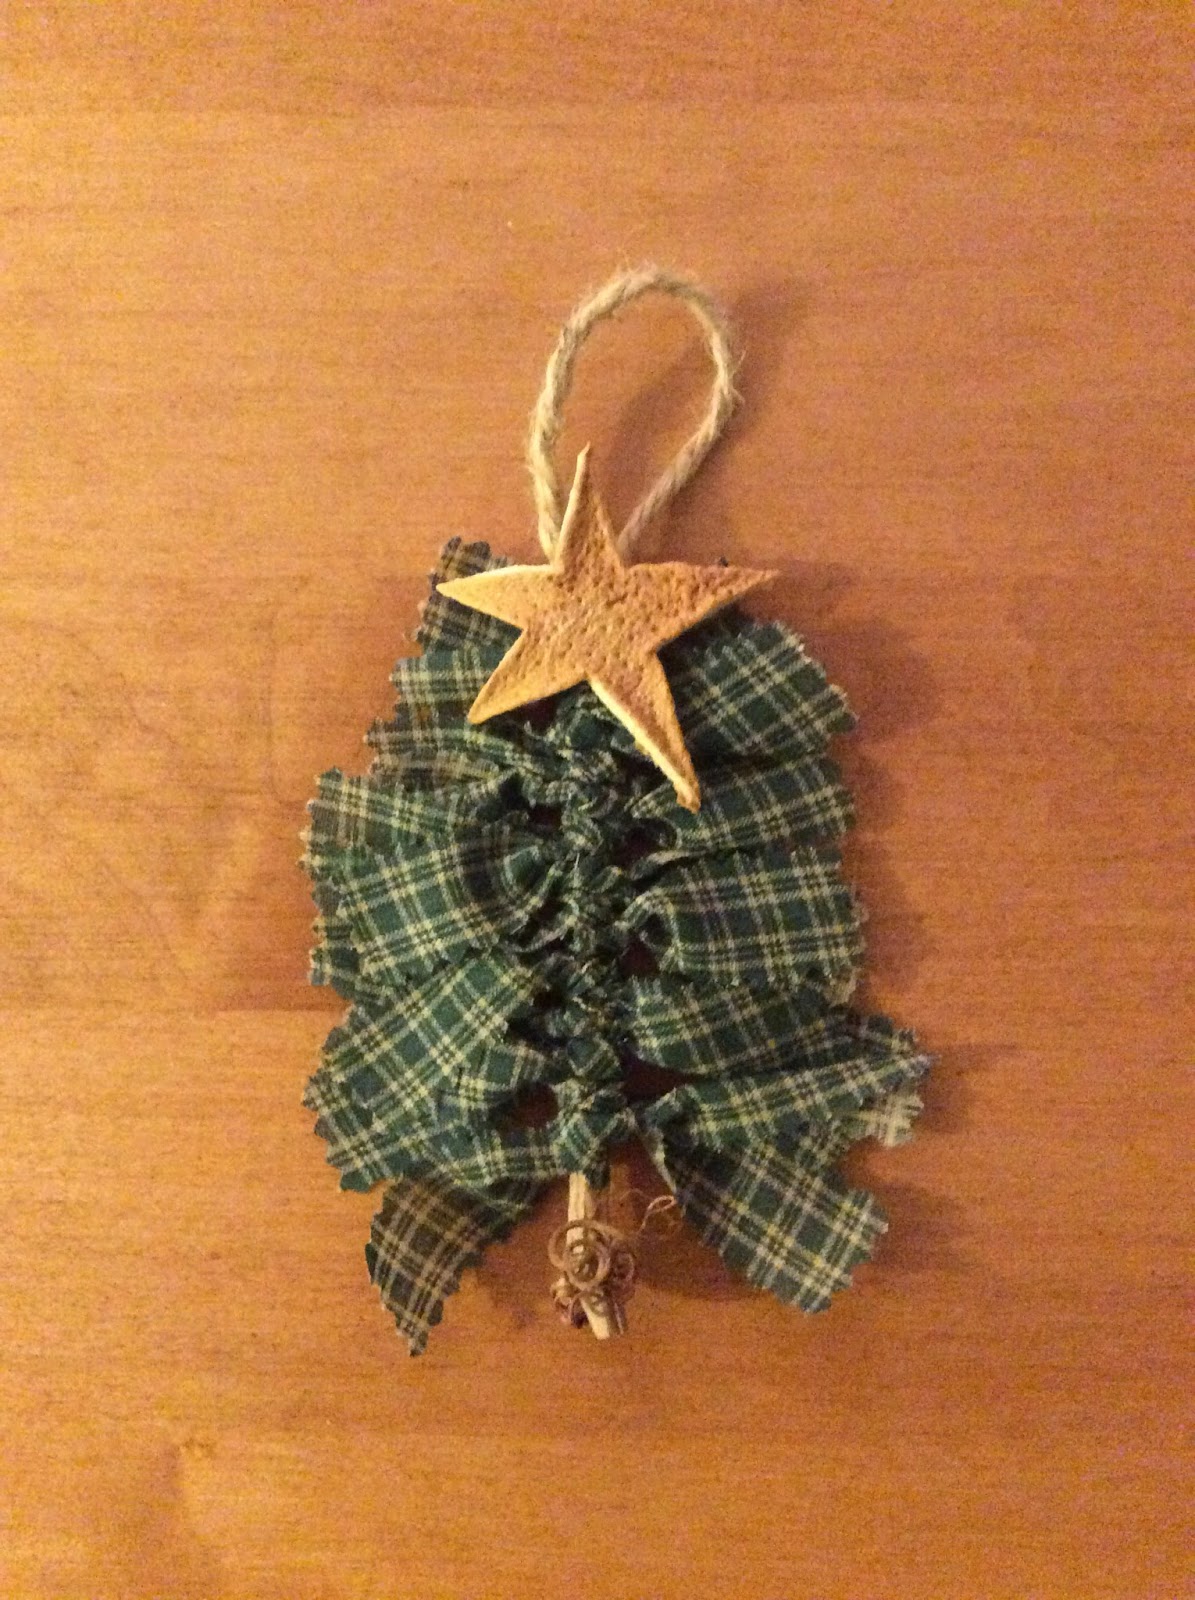
These cute, country/primitive style trees are great ornaments for your tree or gifts for friends, family member, and teachers. They are quick and easy to make, but can be customized with a variety of colors.
Tie these on the outside of presents as a re-usable part of the wrapping, attach them to garland on your mantle or stair railing, or make the hanging loop large enough to hang these on your door knobs.
The size of the tree is determined by the "base", a stick of your choosing. Using a cinnamon stick makes a cute little ornament with a wonderful scent.
MATERIALS
- wooden stick or cinnamon stick
- strips of fabric approximately 1" wide (various lengths)
- scissors
- string, ribbon or twine
- star or button for the top
- glue
1. Begin with shorter pieces of fabric at the top of your stick and tie them securely to the stick. You can use all one pattern/color of fabric per tree or a variety.
2. Continue tying strips of fabric around the stick until you have about 3/4 of the stick covered.
Trim the ends of the fabric strips so they form a tree shape.
3. Tie or glue on a hanging loop a the top. Glue on a star or button at the top.
DONE! Aren't these cute?! And easy to do. You can add a bit of twine or wire around the bottom of the stick to accessorize the trunk too. Enjoy!
Need a cool hat to wear to a tea party? Looking for a unique box for collecting greeting cards at an event? Does your kid want to be the Mad Hatter or a magician for Halloween? Whether you enjoy "Alice in Wonderland" or just love a great costume, this post is for you. This technique can be used to build a variety of top hats, so you can customize it to your needs.
The first thing that you'll need to do is figure out the size that you want to make the hat. If you want to make it to wear (like I did), measure the intended wearer's head circumference, add an inch or so, and this will be the length of your main piece of cardboard (about 22" - 24" for teens and adults). If you want to use the hat for a greeting card box, you'll probably want to make it even larger. You can also make a smaller hat and attach it to a headband.
Your options for decorating the hat are about as diverse as Lewis Carroll's characters. You can wrap the hat in fabric (like I did), wrapping paper, or duct tape. You can cover the hat in paper mache and paint it. You can reference photos online and copy the hat worn in one of the movies, complete with the 10/6 price tag, or use whatever colors and accents that you want. The possibilities are endless.
MATERIALS
- large, flat pieces of cardboard
- tape, glue
- ruler, pencil
- scissors, exacto knife
- materials for covering and decorating the hat
1. For my adult-sized hat, I used a piece of cardboard 22.5" long and 12" wide. I wish that I had done 24" long instead, but I did a little "flair" at the bottom of the top of the hat, which made the opening bigger. Your choice. Cut out the piece of cardboard.
2. Measure and mark the following lines on your piece of cardboard:
a. 2" down from the top edge
b. 1" and 2" up from the bottom edge
c. across the middle
d. every 1.5" or so across the entire length
3. Cut the "cut" lines. Score and fold on the "fold" lines.
4. Form the cardboard into a cylinder. Butt the edges together and tape along the seam on the outside. On the inside, glue/tape a narrow strip of cardboard over the seam to strengthen it.
5. Cut three circles of cardboard that are 12" in diameter. From the center of one, cut a 10" diameter circle out. Cut an additional circle 10.25" in diameter. You should have the following pieces:
a. two 12" diameter circles = top and bottom of brim
b. one 12" diameter ring = middle of brim
c. one 10" diameter circle = inside top of hat
d. one 10.25" diameter circle = outside top of hat
6. Tuck the 10" diameter circle inside the top "flaps" of the hat so that it rests on the fold 2" from the ends.
7. Glue the flaps down to the circle. Start at one side, do the flap across from it, then continue to crisscross - this will help keep the circle centered. You may have to trim the corners off some of the flaps. Don't worry if the hat ends up a little "wonky", it's going to look great.
8. Fill in the center with cardboard scraps, if you want to add strength, and glue in place. Glue the 10.25" circle on top.
9. In the center of the two 12" diameter circles, draw an oval the size that you want for the opening. You can practice getting the shape right on scrap pieces first, then trace it onto your circles. For adults, it's about 7.5" wide by 8.5" long. If the hat won't be worn, you can just do 8" circles. Cut out the middles.
Slide one ring onto the hat from the bottom.
10. Glue the flaps to the ring, crisscrossing like you did for the top. Glue the 12" diameter ring with the 10" diameter hole to the first ring, around the flaps. You may have to trim the ring narrower in some places. Glue the third ring to the narrow ring and the flaps.
11. The hat is built!
Isn't that cool?! Now for the fun part: decorating.
TO COVER THE HAT IN FABRIC
12. Place the hat on a piece of fabric and wrap the fabric up around the brim to determine how much you need in order to cover the entire brim (about 20" diameter circle). Mark/cut the circle of fabric. Glue the fabric to the brim along the seam between the brim and the top, working on opposite sides to keep the fabric centered.
13. Trim away any excess fabric around the top edge. Flip the hat over. Carefully cut an oval out of the center of the fabric about 5" in diameter.
14. Cut slits in the fabric ever inch or so to create flaps.
Glue the flaps to the inside of the hat. Cover the flaps with a strip of fabric or piece of ribbon, if desired.
15. Place the hat upside down on a piece of fabric and wrap the fabric up around the top/sides to determine how much you need in order to cover the entire top/sides (about 30" diameter circle). Mark/cut the circle of fabric. Glue the fabric to the side along the seam between the brim and the side, working on opposite sides to keep the fabric centered.
Trim away any excess fabric around the edge. Cover the joint area with a strip of fabric or a ribbon.
DONE! Add whatever decorations you like, throw the hat on your head, and get ready to receive compliments on the awesome hat you just made.
Whether it's for Halloween or just everyday play, a tail is always lots of fun and not difficult to sew. This tail has a belt so it is independent of any other costume/clothing piece. You can adjust the size to fit your kids or even yourself.
MATERIALS
- fabric (I prefer heavier stuff like fleece, denim, etc.)
- thread
- sewing machine, notions
- tape measure, ruler
- marker
- Velcro
- poly-fill stuffing
1. Cut two triangles of fabric that have two 20" (50 cm) long sides and one 8" (20 cm) short side. You can fold your fabric right sides together and use the folded edge as one of the sides.
2. Sew all three sides (fabric right sides together), leaving a 4" (10 cm) gap on one long side to turn the tail later.
3. Measure around your kid's waist and divide that measurement in half to determine how long you need to make your belt pieces. For my 5 year old, I used two 12" (30 cm) long strips. Cut the strips 3" (7.5 cm) wide, fold in half right sides together width-wise (so it's long and narrow), and sew one end and along the long side (makes a tube with one end closed). Turn right sides out. Top stitch around to help the belt lay flat. Sew a 3" (7.5 cm) piece of Velcro to one side of the stitched/closed end. Repeat for the second strip. (I used a different color fabric for the belt but you can use whatever color you want.)
4. This part is a bit tricky. Flatten the short side of the tail (not the pointy end) opposite of the seam, so that the corners become triangles with the seam down the middle. Take the unstitched/open end of one belt strip and tuck it inside the tail and into one of the corner triangles as far as you can. Pin through the triangle to hold the belt strip inside. Draw a line on the tail corner where you can feel the end of belt strip inside. Use the line you made as your guide and sew across the triangle, making sure you sew over the end of the belt inside.
Repeat for the other belt strip, making sure that you have both Velcro sides facing the same way so that they will line up properly once everything is done.
5. Cut the corner triangles off where you drew the guideline earlier.
6. Turn the tail right sides out.
7. Stuff the tail with poly-fill stuffing. The firmer you stuff it, the more the tail will stick out from the wearer's body. Sew the opening closed.
DONE!
Have fun playing dinosaur, dragon, Gekko, lizard, monster...
Whether it's for you or your kid or your dog, there is never a bad reason to have a super hero cape around, and they are surprisingly easy to make. Older kids can make their own and younger kids can decorate theirs, so it could be a fun party activity. I do HIGHLY RECOMMEND attaching a Velcro closure to the neck, especially for kids and pets, to reduce the risk of choking in the event that the cape becomes hooked on something, but you're welcome to skip that for teens/adults if you don't feel it's necessary.
MATERIALS
- sharp scissors or fabric scissors
- old t-shirt or sweatshirt that is the length you want the cape with a neck opening large enough for the wearer's head to fit through easily (raid the closet or visit a second hand store)
- long ruler or straight edge
- pen or marker that will write on fabric
- Velcro and fabric glue or needle/thread (RECOMMENDED)
- ribbon, iron-on patches, fabric markers, etc. for decorating (optional)
1. Decide whether you want to use the front or back of the shirt as the cape portion. The majority of whichever side you choose will be visible.
2. Turn the shirt inside out and lay it on a table or flat surface with the side you chose for the cape to the top. Smooth the shirt as much as possible, making sure you have it centered.
3. Use the ruler to mark a line from the bottom edge at the very left side up to the left side of the collar where it meets the shoulder seam at the top of the shirt. Repeat for the right side.
4. Cut on these lines, BUT DON'T CUT THE COLLAR.
5. On the opposite side of the shirt, carefully cut around the collar, leaving it attached to the cape portion. You'll be left with the round collar and the cape attached. NOTE: If you think that the collar will be too tight, cut a strip of the t-shirt just below the collar instead, then cut the entire collar off.
6. To attach the Velcro, cut the collar and attach Velcro to both sides of the cut. (Sorry the cape color changes here, the teal one was easier to photograph for these steps.)
7. Decorate as desired. DONE.
If your kid(s) is/are into the Disney Channel TV show "PJ Masks", then you've likely encountered the same thing that I have: it's hard to find clothing inspired by the show. If you've been looking everywhere for a green "Gekko" costume and haven't had any luck, then here's a tutorial for you.
Surf over to the official PJ Masks website for a great 3D view of the characters, including Gekko. There are also downloadable masks, bracelets, and a tutorial for Gekko gloves.
MATERIALS
- medium green hoodie that fits your kid (wash and dry as per manufacturer's instructions)
- dark green or black fabric marker (I used STAINED by Sharpie)
- light/lime green felt or fleece
- fabric glue
- green thread, needle (optional)
- scissors
- long ruler or straight edge
- glow in the dark fabric paint (optional)
1. Lay the hoodie down on a table and smooth the front out as much as possible. Use the ruler and fabric marker to draw lines across the front of the hoodie at an approximately 45 degree angle with about 1 inch (2.5 cm) between the lines. Once you have covered the front of the hoodie with lines in one direction, turn the ruler 90 degrees and repeat the process in the other direction, covering the front of the hoodie with a lattice of diamonds. Repeat this on the back, sleeves and hood until the entire hoodie is covered in the diamonds. Step back and admire your beautiful Gekko "scales".
2. From the fleece/felt, cut out the following pieces:
a. Gekko logo approximately 8 inches (20 cm) wide (I made a stencil by printing the logo off the internet and cutting it out)
b. three circles approximately 2.5 inches (6 cm) in diameter (trace a glass or other circular object)
c. two ovals (hockey rink shape) approximately 2 inches by 3 inches (5 cm by 7.5 cm) (I cut one out and traced around it to get the second one fairly similar)
d. two ovals with one short side squared off approximately 2 inches by 3 inches (5 cm by 7.5 cm) (I cut one out and traced around it to get the second one fairly similar)
3. Use the fabric marker to draw two lines across each of the four oval pieces the short way, evenly spaced. Glue the squared off ovals onto the shoulders of the hoodie with the straight edges towards the hood. Let the glue dry thoroughly. You can also sew around the edge if you like.
4. Glue the ovals onto the elbow areas of the sleeves, with the oval going lengthwise on the sleeve. Let the glue dry thoroughly. You can also sew around the edge if you like.
5. If the hood doesn't have a center seam running front to back on it, lay the hoodie on its side and flatten the hood so that you can find the center and mark it with pins or small marks. Lay the hood so you can see where the center line is and place a fleece/felt circle centered on that line. Sew and/or glue the circle to the center line ONLY WHERE IT TOUCHES THE CENTER LINE a little way back from the front edge of the top of the hood.
Leave a space and attach the next circle the same way. Leave another space and attach the final circle. Allow the glue to dry thoroughly.
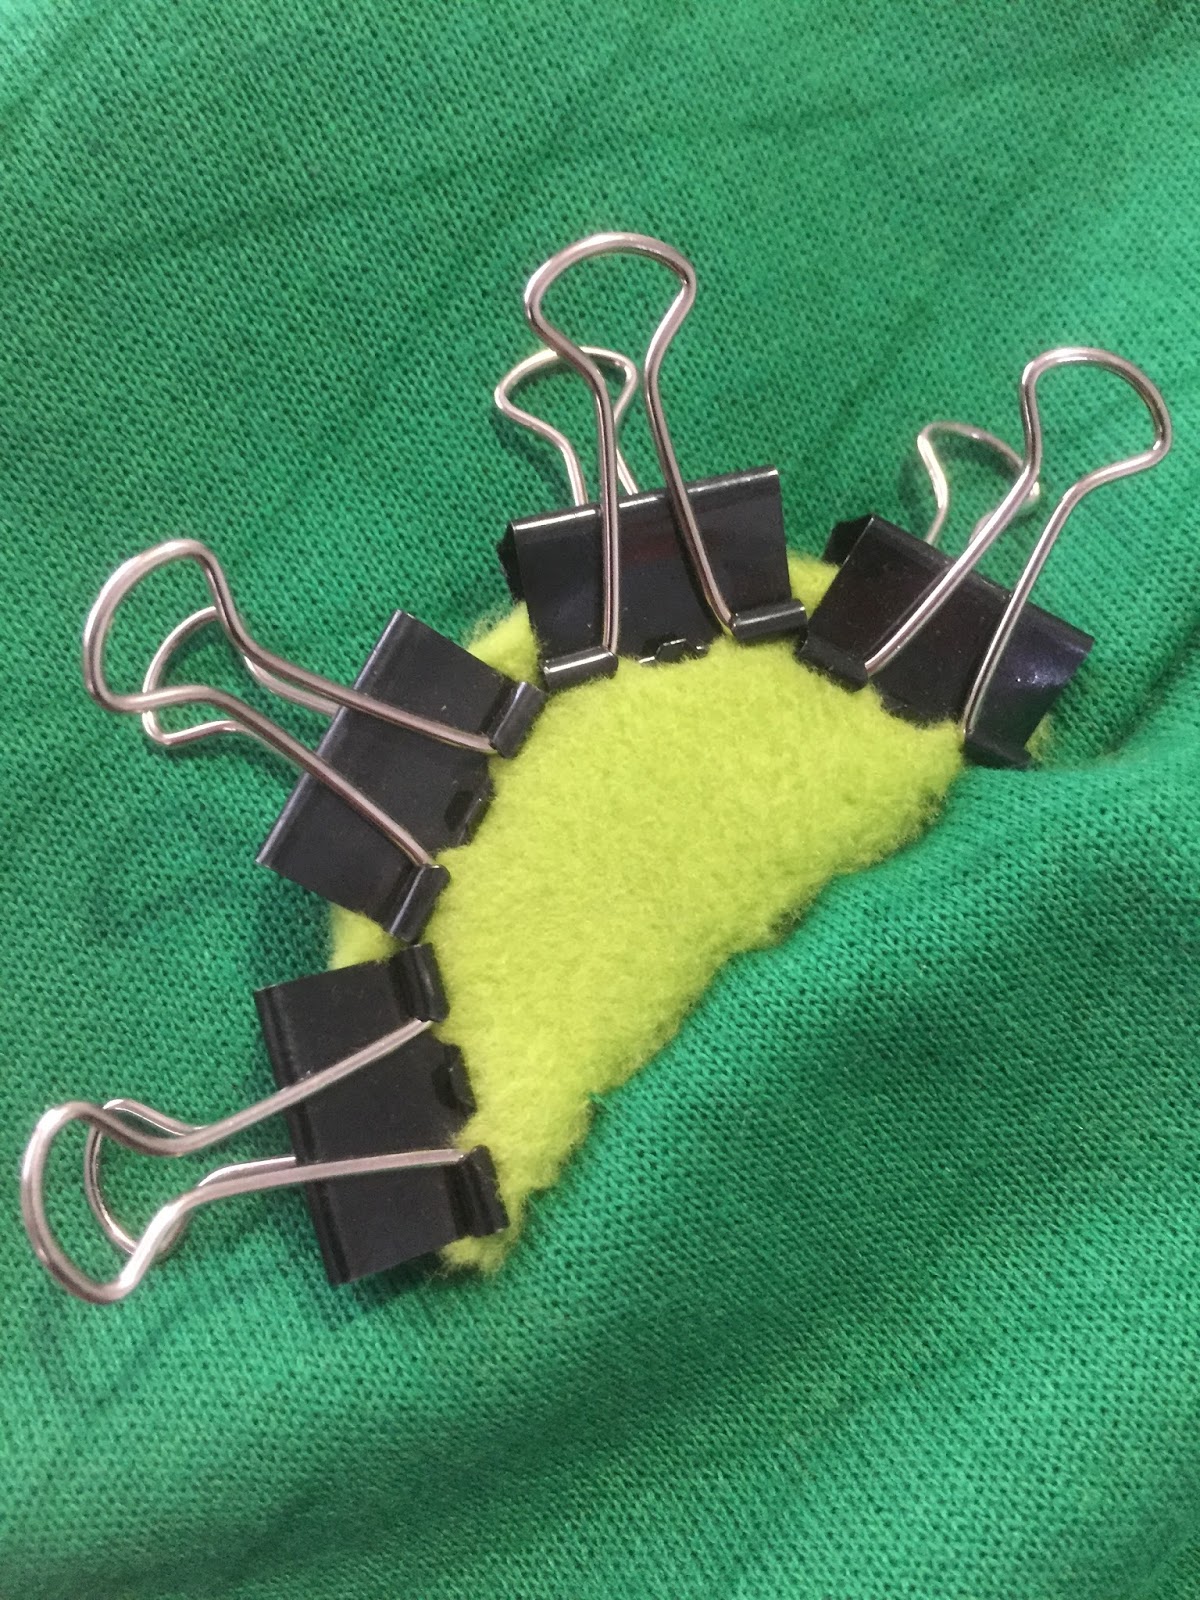
6. Apply glue to the top of the circle and fold it in half onto itself. Sew the edge if you like. I used binder clips to hold it while the glue dried. Repeat for the other two circles and allow the glue to dry thoroughly.
7. If you want the Gekko logo to glow in the dark, paint the front of it with glow in the dark paint. If you plan to sew it to the front of the hoodie, it's probably easiest if you paint it after you sew it on. Glue (or sew) the logo to the front center chest area of the hoodie. NOTE: If the hoodie has a zipper, you'll have to cut the logo in half first.
DONE!
This evening I thought I would check up on what my super-talented artist friend Eileen Gidman has been up to - WOW HAS SHE BEEN BUSY!
Check out her website here: Eileen Gidman
And view her blog here: Eileen Gidman's Blog
Eileen has pioneered this fantastic technique of painting on fabric with permanent dyes. You have NEVER seen stuff like this anywhere else. Each piece is 100% unique and they are all beautiful.
Don't these raspberries just look good enough to eat?!