I hope the holiday season has been good to you and your family. As you're cleaning up and getting back into your normal routine, here's a project that will help the whole family keep things organized in the new year: a toy box.
The first thing that you'll need is a large cardboard box. I saved one from a fax machine, but any large box that you have from Christmas, the office, or the grocery store will work great.
You can decorate the box to match your decor or the kids' favorite characters. You can also use this technique on boxes for other storage solutions.
MATERIALS
- large, sturdy cardboard box
- contact paper, wrapping paper, fabric, or other similar material that is large enough to cover the sides of your box
- exacto knife, scissors
- decorative duct tape (optional)
- large letter stickers or stencil (optional)
- white glue or glue gun
1. Remove any excess tape and labels from your box. Cut the top flaps off the box.
2. If your box has pre-cut hand-holds, decide whether you want to trim away the flap (like I did), cover the flap with your paper/fabric, or solidify the flap with tape and cover it. You can also cut hand-holds into the sides if you want them.
3. Tape over any damaged areas of the sides of the box.
4. Glue and/or tape down the flaps inside the bottom of the box.
5. Wrap your contact paper, wrapping paper or fabric around the sides of your box, leaving an inch or two overlap at the top to wrap over the top edge and secure inside. This leaves a nice, finished top edge. You can also stick a strip of duct tape along the top edge or inside the box to secure your paper/fabric if it isn't staying stuck properly.
6. Trim out your hand-holds, if applicable.
7. At this point, your box can be "done", or you can add more to it.
8. I used letter stickers to add the word "TOYS" to one side.
9. I also put a strip of decorative duct tape around the bottom edge.
DONE! Now for the hardest part: getting the kids to use it.
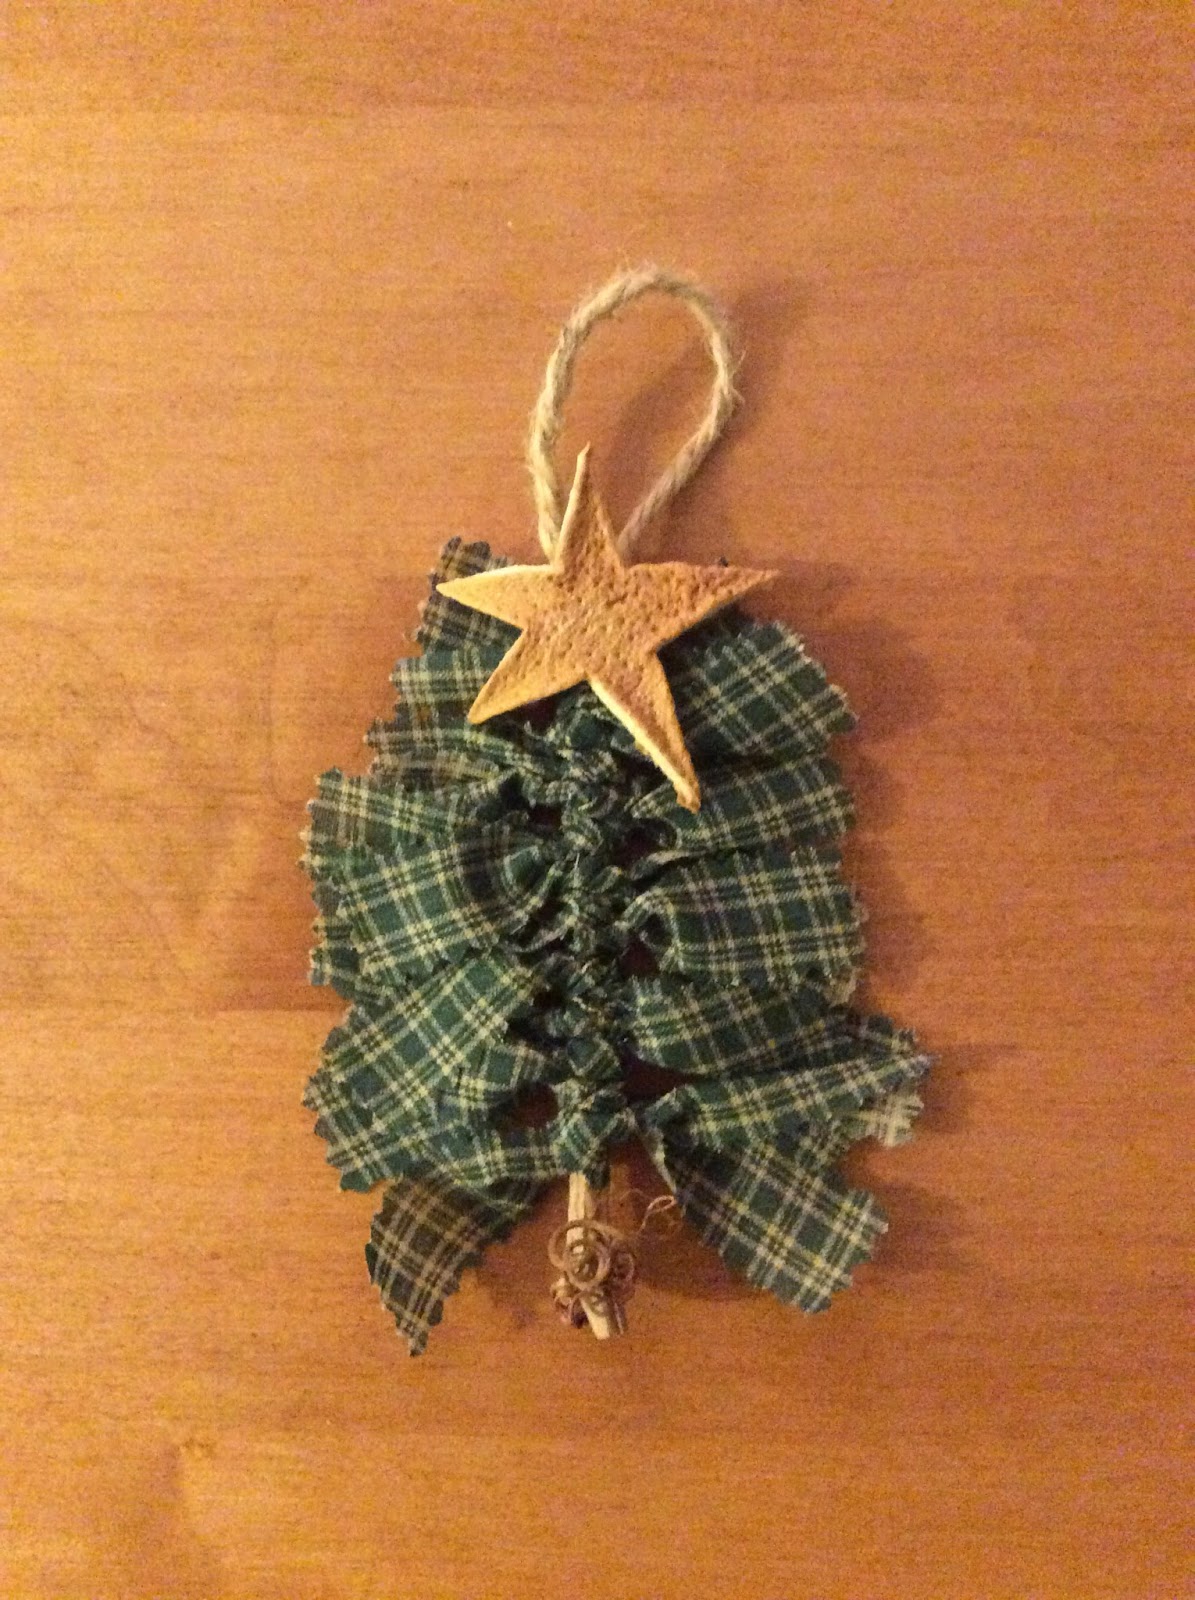
These cute, country/primitive style trees are great ornaments for your tree or gifts for friends, family member, and teachers. They are quick and easy to make, but can be customized with a variety of colors.
Tie these on the outside of presents as a re-usable part of the wrapping, attach them to garland on your mantle or stair railing, or make the hanging loop large enough to hang these on your door knobs.
The size of the tree is determined by the "base", a stick of your choosing. Using a cinnamon stick makes a cute little ornament with a wonderful scent.
MATERIALS
- wooden stick or cinnamon stick
- strips of fabric approximately 1" wide (various lengths)
- scissors
- string, ribbon or twine
- star or button for the top
- glue
1. Begin with shorter pieces of fabric at the top of your stick and tie them securely to the stick. You can use all one pattern/color of fabric per tree or a variety.
2. Continue tying strips of fabric around the stick until you have about 3/4 of the stick covered.
Trim the ends of the fabric strips so they form a tree shape.
3. Tie or glue on a hanging loop a the top. Glue on a star or button at the top.
DONE! Aren't these cute?! And easy to do. You can add a bit of twine or wire around the bottom of the stick to accessorize the trunk too. Enjoy!
Snowmen decorations are great because they aren't just for Christmas, you can have them up all winter. These wood slice snowmen can be made whatever size you like and decorated however you want. Not only are these cute decorations for your home, they make great gifts.
The main component is slices of logs. Larger diameter slices approximately 1" thick can be attached to a larger board and smaller diameter slices approximately 1/2" thick can be attached to a craft (popsicle) stick or twig.
You can decorate the snowmen with a variety of items, such as buttons, fabric or ribbon for scarves, painted wood bits, glitter, stickers, and more. Once the wood slices have been cut, kids can help with the assembly and decorate the snowmen.
MATERIALS
- slices of logs
- board or craft stick
- glue gun or wood glue
- white acrylic paint
- black and orange acrylic paint or permanent markers
- buttons, "scarf", and other decorations
- string, ribbon or wire for hanging, if desired
1. Cut (or have cut) the logs into slices. Leave natural or paint with white acrylic paint. Water down the paint if you want to allow the natural grain of the wood to show through. Allow the paint to dry.
2. Glue three slices to a board or craft stick. Add a hanging loop if desired. Allow glue to dry.
3. Paint or glue on eyes, nose, mouth and buttons. Tie or glue on a "scarf". Add any other decorations you like.
DONE! Display your beautiful snowman for all your guests to see.
Here's a cute and easy project that you can do to get in the holiday spirit. Kids can make their own (with supervision or help during the glue gun use) as decorations or gifts, and you can customize yours to suit your style and decor.
These "candies" can also be strung together to make a garland to wrap around your Christmas tree or stair rail. I'm sure you can also come up with other fun ideas for them, like piling them in baskets or tucking them into the branches of your tree.
MATERIALS
- empty pill bottles (without lids) or similar sized cylinders
- rectangles of fabric approximately 5" by 6"
- string, twine or ribbon
- glue gun, sticks
- scissors
1. Lay the pill bottle on the fabric and glue gun one edge of the fabric to the bottle.
2. Roll the bottle in the fabric and glue the other edge of the fabric to the bottle.
3. Cut pieces of string and tie them around the fabric on both sides of the bottle. Trim the ends of the string.
4. DONE! You can tie the candies together with more string to form a garland or leave them separate. Enjoy!