Friday, March 2, 2018

Unicorn Pinata


My niece is having a unicorn themed birthday party and she asked me to make a unicorn pinata for her. I was happy to oblige.

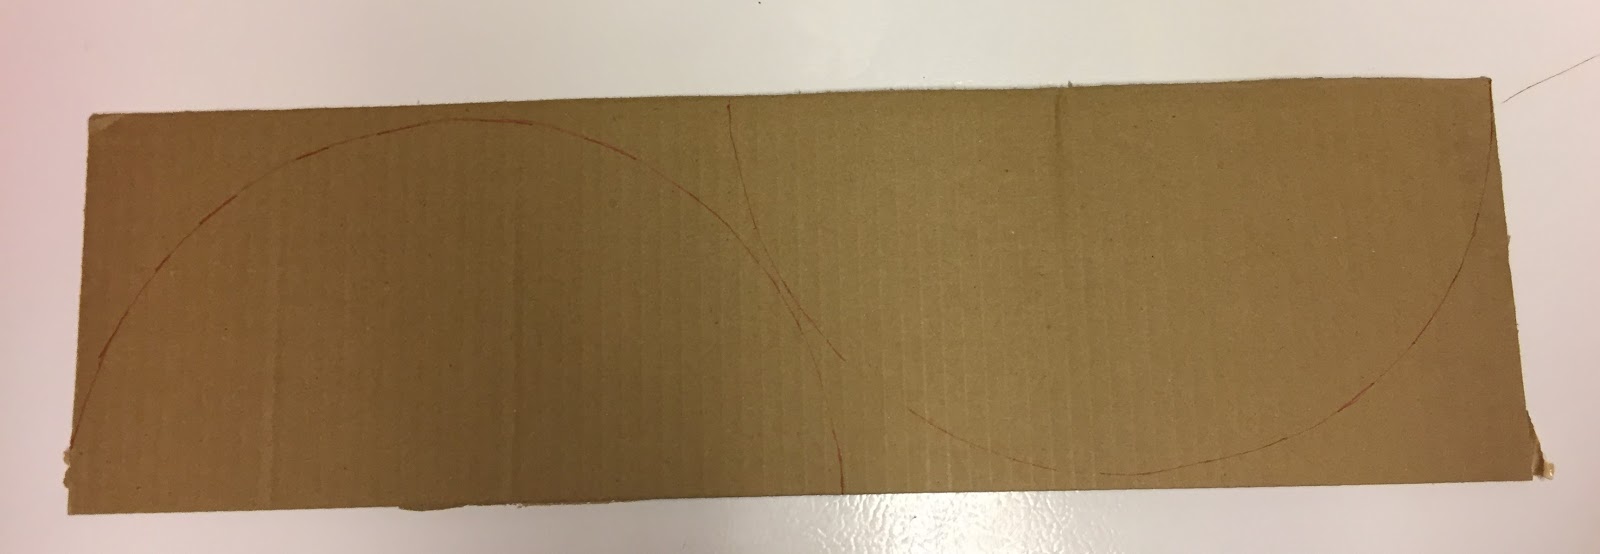
The main difference between a unicorn and a horse is the horn, although traditional unicorns were daintier and more goat-like than most modern portrayals. When drawing the initial sketch for the sides of the unicorn, I did try to make it a little slimmer than I would have for a horse or donkey pinata.

I was originally planning to do mostly white tissue paper, but I decided that I would have to paint the cardboard with white acrylic paint first in order to not have the brown show through, so I went with a rainbow pattern instead. You can use whatever colors you prefer.

MATERIALS
- pieces of cardboard
- gold wrapping paper, tissue paper, tape, or similar
- tissue paper (any colors)
- scissors, exacto knife
- pencil, ruler
- glue gun, glue sticks
- white glue
- string or ribbon

1. Draw an outline of a horse onto cardboard.


2. Cut out the horse shape.


Trace the shape onto a second piece of cardboard and cut out a second horse shape.

3. Cut some strips of cardboard about 2.5" wide.

Glue the strips around the edges of one of the horse shapes, except for the ear area.


4. Fill the pinata with goodies (candy, hair accessories, erasers, toys, etc.).


5. Glue the second horse shape onto the top, sealing the goodies inside.


6. (You can do this step now or once the pinata is covered with tissue paper.) 

Find where the hanging string should go so the pinata hangs fairly level by holding it with your thumb and one finger along the back and lifting it slightly. Punch holes into the cardboard and thread a long string or ribbon through the holes. Tie knots in the string at the end and near the pinata's back.


7. Cut tissue paper strips approximately 2" wide and clip along them approximately 1" deep every 1" or so.

Glue the strips to the pinata, starting at the bottom and working your way up all the way around.


8. Wrap tissue paper around the ears.


9. Cut a long, slim triangle of cardboard. Mine was about 2" wide a the bottom and about 4" long.


10. Roll the triangle into a cone shape and glue it. Cover the cone with gold paper or tape. This is the unicorn horn.


11. Glue the bottom of the horn onto the head of the pinata.


12. Add longer strips of tissue paper to the head and back end of the pinata for a mane and tail, if desired. I liked how it looked without doing this.

DONE!


Enjoy watching the kids have a blast destroying all your hard work. ;)

Sunday, February 11, 2018

LEGO Ninjago Containers


Whether you're looking for additional storage for Lego pieces or decorations for a party or bedroom, these quick and easy Ninjago containers are the perfect thing for you. These are a fun project that kids can help with and could be done as a party activity.

The base for these containers is whatever empty containers you have around. I used empty baby snack containers, but you could use coffee cans, glass jars, or any other containers you have around. Make sure you thoroughly wash and dry the containers before you start.

I used wrapping paper to cover the containers, but you could use other colored paper, contact paper, colored duct tape, or even fabric. I also used printed Lego ninja eyes that are available for personal use download at www.halegrafx.com. You can draw/design your own eyes or print these ones or others that you can find online. The size of your paper and eyes will depend on your containers.

MATERIALS
- empty, clean container(s)
- wrapping paper (solid colors: blue, black, white, red, green, or your choice) or similar
- glue stick, spray glue, or tape roller
- scissors
- pencil, ruler/tape measure
- Lego ninja eyes
- clear packing tape (optional)

1. Thoroughly wash and dry the containers and lids. Measure the height of the container and the circumference (distance around the sides).


2. Cut a strip of wrapping paper with the width matching the container height and the length about 1" longer than the container circumference.


3. Draw or print off Lego ninja eyes. I used 3" wide ones for my containers.


4. Cut out the number of eyes that you need for your containers.


5. Glue the strip of wrapping paper to the sides of the container. It's okay if it's rough, because that makes the paper look more like the ninja's fabric hood.


6. Glue a set of eyes onto the side of the container opposite the seam in the wrapping paper.


7. OPTIONAL: To make the container shiny like Lego and a bit more durable, cover the wrapping paper and eyes with clear packing tape.


8. Repeat the steps for additional containers, if desired. If the lids don't match the ninja's colors, you can spray paint them with paint designed for plastic (follow the instructions on the cans) or cover the lids with wrapping paper. DONE!

Sunday, February 4, 2018

Star Pinata (as seen on PAW Patrol)

Photo credit: "tvokids" on YouTube.

My kids enjoy the TV show "PAW Patrol" and a recent episode focused on a special star-shaped pinata. Since we have a birthday party coming up and had chosen "PAW Patrol" as the theme, I decided to re-create the star pinata for the party.

This tutorial details how to build a star-shaped pinata and then how to decorate it to look like the one on "PAW Patrol", but you can decorate yours however you choose. The instructions remain the same, just use different colors of tissue paper.

The pinata on the show is a "pull string" type, with various ribbons at the bottom, one of which opens the pinata, spilling the goodies out. I did not do this, as my kids enjoy the smashing and it's more entertaining to watch. There are tutorials available out there on how to do a "pull string" type pinata though, if you'd prefer that kind.

MATERIALS
- pieces of cardboard
- purple ribbon
- tissue paper: red, yellow, lime green, purple, blue, and pink
- scissors, exacto knife
- pencil, ruler
- glue gun, glue sticks
- white glue
- string or ribbon

1. Draw 5 half-circles with a radius of 6" (12" diameter) onto cardboard.


2. Cut out the 5 half-circles.


3. Crease the half-circles and form them into cones.


4. Glue gun the half-circles into cone shapes. I overlapped about 3 inches of cardboard. This makes the bottom of the cone about 5" in diameter.


5. Cut a strip of cardboard that is 5" wide and at least 26" long.

Punch holes into two opposite sides of the cones, just up from the bottom. Set them on the cardboard strip, starting at one end.

Punch holes through the cardboard strip approximately every 5" where the cones sit, one underneath each cone hole.

Thread string or ribbon down through the cones and through the cardboard strip.


6. Tie the strings/ribbons on the underside of the cardboard strip.


7. Bring the ends of the cardboard strip together, overlapping about an inch, and tie through to the underside, creating a ring with the 5 cones sticking out.


8. Glue gun the overlapping area of the cardboard strip.

Glue gun the bottoms of the cones to the cardboard strip.


NOTE: If you want to have even more space for goodies inside the pinata, you can carefully cut through the cardboard strip into the middle of the cones. I decided that there was plenty of space for goodies without doing this.

9. Cover the tips of the cones with lime green tissue paper. I happened to have duct tape the correct color, so I used it, and covered the seams in the cones at the same time.


10. Glue gun a 12" piece of purple ribbon to the end of one cone to hang the pinata. You can also punch holes through the tip of the cone and thread the ribbon through, then tie a knot in the ends.


11. Cut two 10" diameter cardboard circles.


12. Cut 4 each of the following tissue paper circles:
- 12" diameter purple
- 10" diameter blue
- 8" diameter pink
- 6" diameter yellow
- 4" diameter blue


13. Clip the edges of the circles every 1" around about 1" deep.


14. Glue one purple tissue paper circle to one side of a cardboard circle. I prefer white glue for all the tissue paper work.


15. Glue a second purple circle to the opposite side of the same cardboard circle.

Add 2 of each color circle, from largest to smallest, on top of the purple. Off-set the circles slightly so the fringes don't line up exactly and it looks fluffier.


Repeat steps 14 and 15 on the second cardboard circle.

16. Cut 2" strips of red, yellow, and lime green tissue paper. Cut every 1" along one side of the strips about 1" deep.


17. Starting at the tip of the cones, glue a red strip, with the "fringe" edge pointing out (away from the center).


18. Add a second red strip, then two yellow strips, then two lime green strips.


Repeat for all 5 cones.

19. Add a lime green strip that is fringed on both sides to the area between the cones.


20. Glue lime green strips around the edges of the cardboard strip the cones are attached to, with the fringes sticking out.


21. Repeat on the opposite side.


22. Glue one cardboard circle to one side of the cardboard strip and cone assembly. Let the glue dry completely.


23. Fill the pinata with goodies. I found "PAW Patrol" candies, fruit snacks, and facial tissues to put inside mine, then added some other candies.

Glue the other circle to the other side of the pinata.


DONE!


Whew! I know it seems like a lot of steps and it's a little tricky, but it is really fun to make and even more fun to watch the kids break it open.

Monday, January 29, 2018

Bi-fold Doors to French Doors Conversion


The picture really doesn't do this project justice. I really dislike bi-fold doors. They're loud, awkward, and a pinch-point risk. The bi-fold doors on our laundry/furnace room were so hard to open and close that they were often left open, leaving the junk behind them in plain sight. I went searching online for a solution and saw tutorials for converting bi-fold doors to French doors.

The process seemed easy enough, so I bought the hardware that I needed, dug out my cordless drill/screwdriver, and gave it a shot. It really was easy, and I couldn't be happier with the end result. No more squeaky, rough sliding, just smooth opening and closing. The doors also open almost completely out of the way now, allowing for the full doorway to be used for hauling things in and out.

I spent less than $20 to do this conversion and I'm already thinking about converting other bi-fold doors in our house this way. Different tutorials might tell you a bit different order to do things in - I did it in a way that was easiest for me, which was to leave the doors up while drilling and attaching hinges, then removing them one at a time. Read through my instructions and decide for yourself what works best for you.

MATERIALS
- existing bi-fold doors
- three pairs of door hinges (size depends on the size and weight of your doors)
- one double magnetic catch
- second door handle, if your doors only have one
- drill
- screwdriver(s)
- pencil
- measuring tape
- sandpaper
- drywall putty or wood filler, trowel
- paint, paint brush
- step stool/ladder (optional)

1. If your existing doors only have a single handle, you'll have to add a second one to the other door. I had a handle that matched the existing one, so I only had to add. If you can't find a matching handle, you'll have to get two new ones and add one and replace the other.

Remove the existing handle so you can measure the placement of the hole. Measure and mark the mirror-image spot on the other door, so they are equally spaced from the center of the doorway. Drill through the door, using a bit that is big enough for the bolt for the handle to pass through smoothly. Attach both handles securely.


2. Measure and mark the center of the doors along the edges where the hinges will be attached. Hold a hinge against the door, with the folding edge against the outside edge of the door, centered on your mark, and trace inside both circles with a pencil.

Measure and mark down from the top of the doors and up from the bottom of the doors along the edges where the hinges will be attached. I made mine 5" from the top and from the bottom. Hold a hinge against the door, with the folding edge against the outside edge of the door, above or below your mark, and trace inside both circles with a pencil.


Do the same for both doors.

3. Use a drill bit that is slightly narrower than the screws that came with the hinges, so the threads will bit into the wood. Drill into the doors inside the circles that you marked. Drill in as far as the screw will be going in.


4. Attach 5 of the hinges to the doors, leaving one of the bottom hinges off so you can use it to trace the hole placement onto the door frame. Make sure that the hinges are folded so that they will open and close the way you want them to.


5. This is when I removed one door (the one that moved completely, not the one with the stationary side). I removed the hinges between the doors, then popped it off the track and removed the bi-fold hardware from the end.

Once I had that door attached to the door frame (see below), then I removed the second door, the bi-fold track, and the hardware from the door. This kept my work area less cluttered and prevented me from mixing up which door went where.

NOTE: You may want to do step 9 while the doors are down.

6. You may want a second person to help you with this part. I did it myself, by resting the bottom of the door on a narrow wedge (use a piece of wood, a book, a slipper, a folded towel, whatever works).

Position the door about 1/4" down from the top of the door frame, making sure that it will close (not all door frames are exactly "square") the way you want it. Once you have it where you want it, mark the top and bottom of where the hinge needs to be attached to the door frame.

Lean the door aside and use your 6th hinge to mark the hole positions. NOTE: The hinges need to be positioned so the folding part is outside of the door frame.

Drill holes into the door frame inside the circles you marked. Re-position the door and screw the hinge in place, keeping your wedge in place for now (or having your helper hold it) so the weight of the door isn't all on the one hinge.


7. Press the middle and bottom hinges against the door frame where they need to be attached and mark the hole positions. Move the hinges out of the way and drill into the holes. Screw the hinges to the door frame.

8. Repeat steps 6 and 7 on the second door, attaching the 6th hinge to the bottom of the door while you have it down. When positioning the second door, line up the tops of the doors as best as you can.

9. Open the package for the magnetic catch and hold one of the metal plates on the top corner of each door and mark the hole. Drill the hole. (You can do this earlier, when the doors are down, or now once they're up.)


10. Attach the metal plates to the doors.


11. Stand inside the room and pull the doors closed while holding the magnetic catch up against the top of the door frame. Let both doors stick to it and get it positioned where you want it. Mark the holes with a pencil. Open the doors. Drill the holes then screw the catch in place.


12. The last step is to wash, sand, fill, sand, and paint the areas where the previous hardware was attached to the doors and door frame. DONE!


Enjoy your quieter, handier doors!