

Photo credit: "tvokids" on YouTube.
My kids enjoy the TV show "PAW Patrol" and a recent episode focused on a special star-shaped pinata. Since we have a birthday party coming up and had chosen "PAW Patrol" as the theme, I decided to re-create the star pinata for the party.
This tutorial details how to build a star-shaped pinata and then how to decorate it to look like the one on "PAW Patrol", but you can decorate yours however you choose. The instructions remain the same, just use different colors of tissue paper.
The pinata on the show is a "pull string" type, with various ribbons at the bottom, one of which opens the pinata, spilling the goodies out. I did not do this, as my kids enjoy the smashing and it's more entertaining to watch. There are tutorials available out there on how to do a "pull string" type pinata though, if you'd prefer that kind.
MATERIALS
- pieces of cardboard
- purple ribbon
- tissue paper: red, yellow, lime green, purple, blue, and pink
- scissors, exacto knife
- pencil, ruler
- glue gun, glue sticks
- white glue
- string or ribbon
1. Draw 5 half-circles with a radius of 6" (12" diameter) onto cardboard.
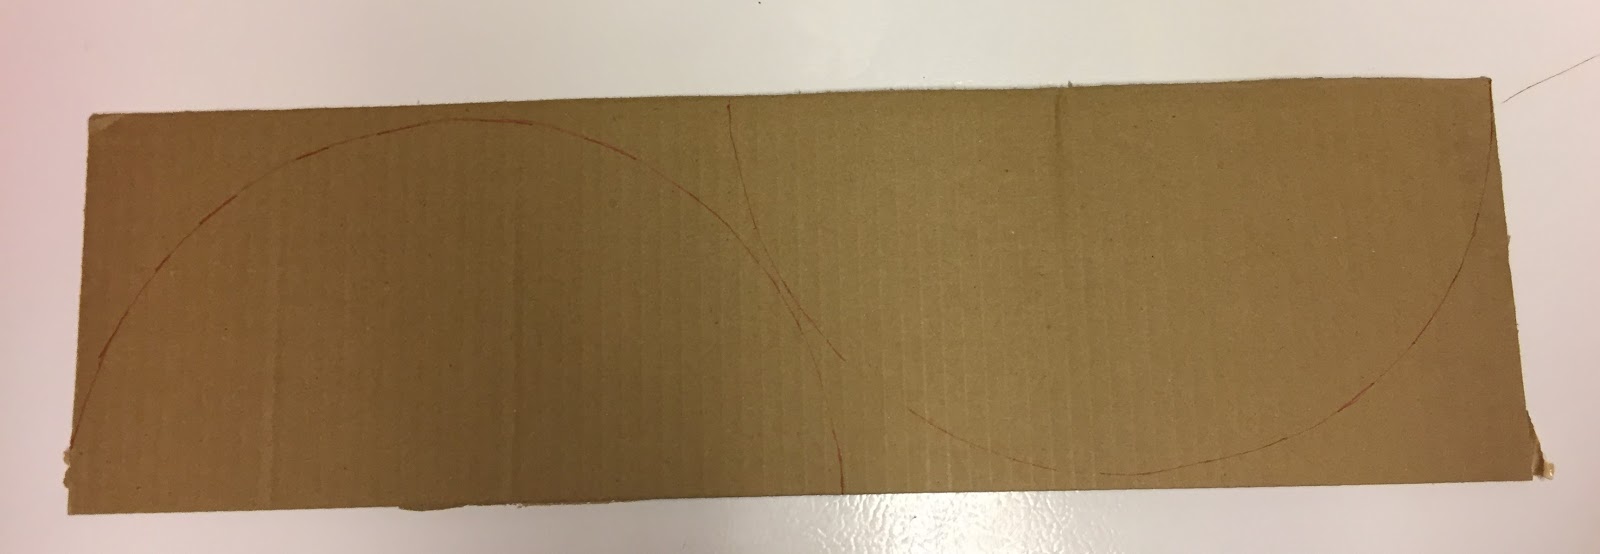
2. Cut out the 5 half-circles.

3. Crease the half-circles and form them into cones.

4. Glue gun the half-circles into cone shapes. I overlapped about 3 inches of cardboard. This makes the bottom of the cone about 5" in diameter.

5. Cut a strip of cardboard that is 5" wide and at least 26" long.
Punch holes into two opposite sides of the cones, just up from the bottom. Set them on the cardboard strip, starting at one end.
Punch holes through the cardboard strip approximately every 5" where the cones sit, one underneath each cone hole.
Thread string or ribbon down through the cones and through the cardboard strip.

6. Tie the strings/ribbons on the underside of the cardboard strip.

7. Bring the ends of the cardboard strip together, overlapping about an inch, and tie through to the underside, creating a ring with the 5 cones sticking out.

8. Glue gun the overlapping area of the cardboard strip.
Glue gun the bottoms of the cones to the cardboard strip.

NOTE: If you want to have even more space for goodies inside the pinata, you can carefully cut through the cardboard strip into the middle of the cones. I decided that there was plenty of space for goodies without doing this.
9. Cover the tips of the cones with lime green tissue paper. I happened to have duct tape the correct color, so I used it, and covered the seams in the cones at the same time.

10. Glue gun a 12" piece of purple ribbon to the end of one cone to hang the pinata. You can also punch holes through the tip of the cone and thread the ribbon through, then tie a knot in the ends.

11. Cut two 10" diameter cardboard circles.

12. Cut 4 each of the following tissue paper circles:
- 12" diameter purple
- 10" diameter blue
- 8" diameter pink
- 6" diameter yellow
- 4" diameter blue

13. Clip the edges of the circles every 1" around about 1" deep.

14. Glue one purple tissue paper circle to one side of a cardboard circle. I prefer white glue for all the tissue paper work.

15. Glue a second purple circle to the opposite side of the same cardboard circle.
Add 2 of each color circle, from largest to smallest, on top of the purple. Off-set the circles slightly so the fringes don't line up exactly and it looks fluffier.

Repeat steps 14 and 15 on the second cardboard circle.
16. Cut 2" strips of red, yellow, and lime green tissue paper. Cut every 1" along one side of the strips about 1" deep.

17. Starting at the tip of the cones, glue a red strip, with the "fringe" edge pointing out (away from the center).

18. Add a second red strip, then two yellow strips, then two lime green strips.

Repeat for all 5 cones.
19. Add a lime green strip that is fringed on both sides to the area between the cones.

20. Glue lime green strips around the edges of the cardboard strip the cones are attached to, with the fringes sticking out.

21. Repeat on the opposite side.

22. Glue one cardboard circle to one side of the cardboard strip and cone assembly. Let the glue dry completely.

23. Fill the pinata with goodies. I found "PAW Patrol" candies, fruit snacks, and facial tissues to put inside mine, then added some other candies.
Glue the other circle to the other side of the pinata.

DONE!

Whew! I know it seems like a lot of steps and it's a little tricky, but it is really fun to make and even more fun to watch the kids break it open.
No comments:
Post a Comment