Whether it's for Halloween or just everyday play, a tail is always lots of fun and not difficult to sew. This tail has a belt so it is independent of any other costume/clothing piece. You can adjust the size to fit your kids or even yourself.
MATERIALS
- fabric (I prefer heavier stuff like fleece, denim, etc.)
- thread
- sewing machine, notions
- tape measure, ruler
- marker
- Velcro
- poly-fill stuffing
1. Cut two triangles of fabric that have two 20" (50 cm) long sides and one 8" (20 cm) short side. You can fold your fabric right sides together and use the folded edge as one of the sides.
2. Sew all three sides (fabric right sides together), leaving a 4" (10 cm) gap on one long side to turn the tail later.
3. Measure around your kid's waist and divide that measurement in half to determine how long you need to make your belt pieces. For my 5 year old, I used two 12" (30 cm) long strips. Cut the strips 3" (7.5 cm) wide, fold in half right sides together width-wise (so it's long and narrow), and sew one end and along the long side (makes a tube with one end closed). Turn right sides out. Top stitch around to help the belt lay flat. Sew a 3" (7.5 cm) piece of Velcro to one side of the stitched/closed end. Repeat for the second strip. (I used a different color fabric for the belt but you can use whatever color you want.)
4. This part is a bit tricky. Flatten the short side of the tail (not the pointy end) opposite of the seam, so that the corners become triangles with the seam down the middle. Take the unstitched/open end of one belt strip and tuck it inside the tail and into one of the corner triangles as far as you can. Pin through the triangle to hold the belt strip inside. Draw a line on the tail corner where you can feel the end of belt strip inside. Use the line you made as your guide and sew across the triangle, making sure you sew over the end of the belt inside.
Repeat for the other belt strip, making sure that you have both Velcro sides facing the same way so that they will line up properly once everything is done.
5. Cut the corner triangles off where you drew the guideline earlier.
6. Turn the tail right sides out.
7. Stuff the tail with poly-fill stuffing. The firmer you stuff it, the more the tail will stick out from the wearer's body. Sew the opening closed.
DONE!
Have fun playing dinosaur, dragon, Gekko, lizard, monster...
I recently fell in love with Disney's "Maleficent", a re-telling of "Sleeping Beauty" with much more focus on the "evil queen". The film is beautiful, as is the story, and when I was looking to transform a little hinged box that I'd been saving for years, I decided to go with a Maleficent theme.
SUPPLIES:
box
acrylic paint
polymer clay
paper and pencil
feathers
crystal/stone
charms
glue
1. Look at images from the film on the internet or watch the movie to get a feel for the magical scenery and creatures. The colors also inspired me. For the front and back of the box, I traced silhouettes of Maleficent so they would line up towards the "spine" of the box. On the front I went with her wing-less dark queen silhouette from when she curses Aurora and on the back I did her happy, winged, long-hair silhouette from after she saves Aurora. Inside I did one side as a night time scene from the moors and the other side a woodsy daytime scene.
2. Add accents like polymer clay, charms, stones, crystals, and feathers. I made black polymer clay thorns and a raven for the front of the box and brown/green tree branches for the back. (After I took photos) I super glued a white quartz stone inside and plan to add some brown and black feathers also. Other charms and stones might come later as I collect "magical" things.
3. DONE.
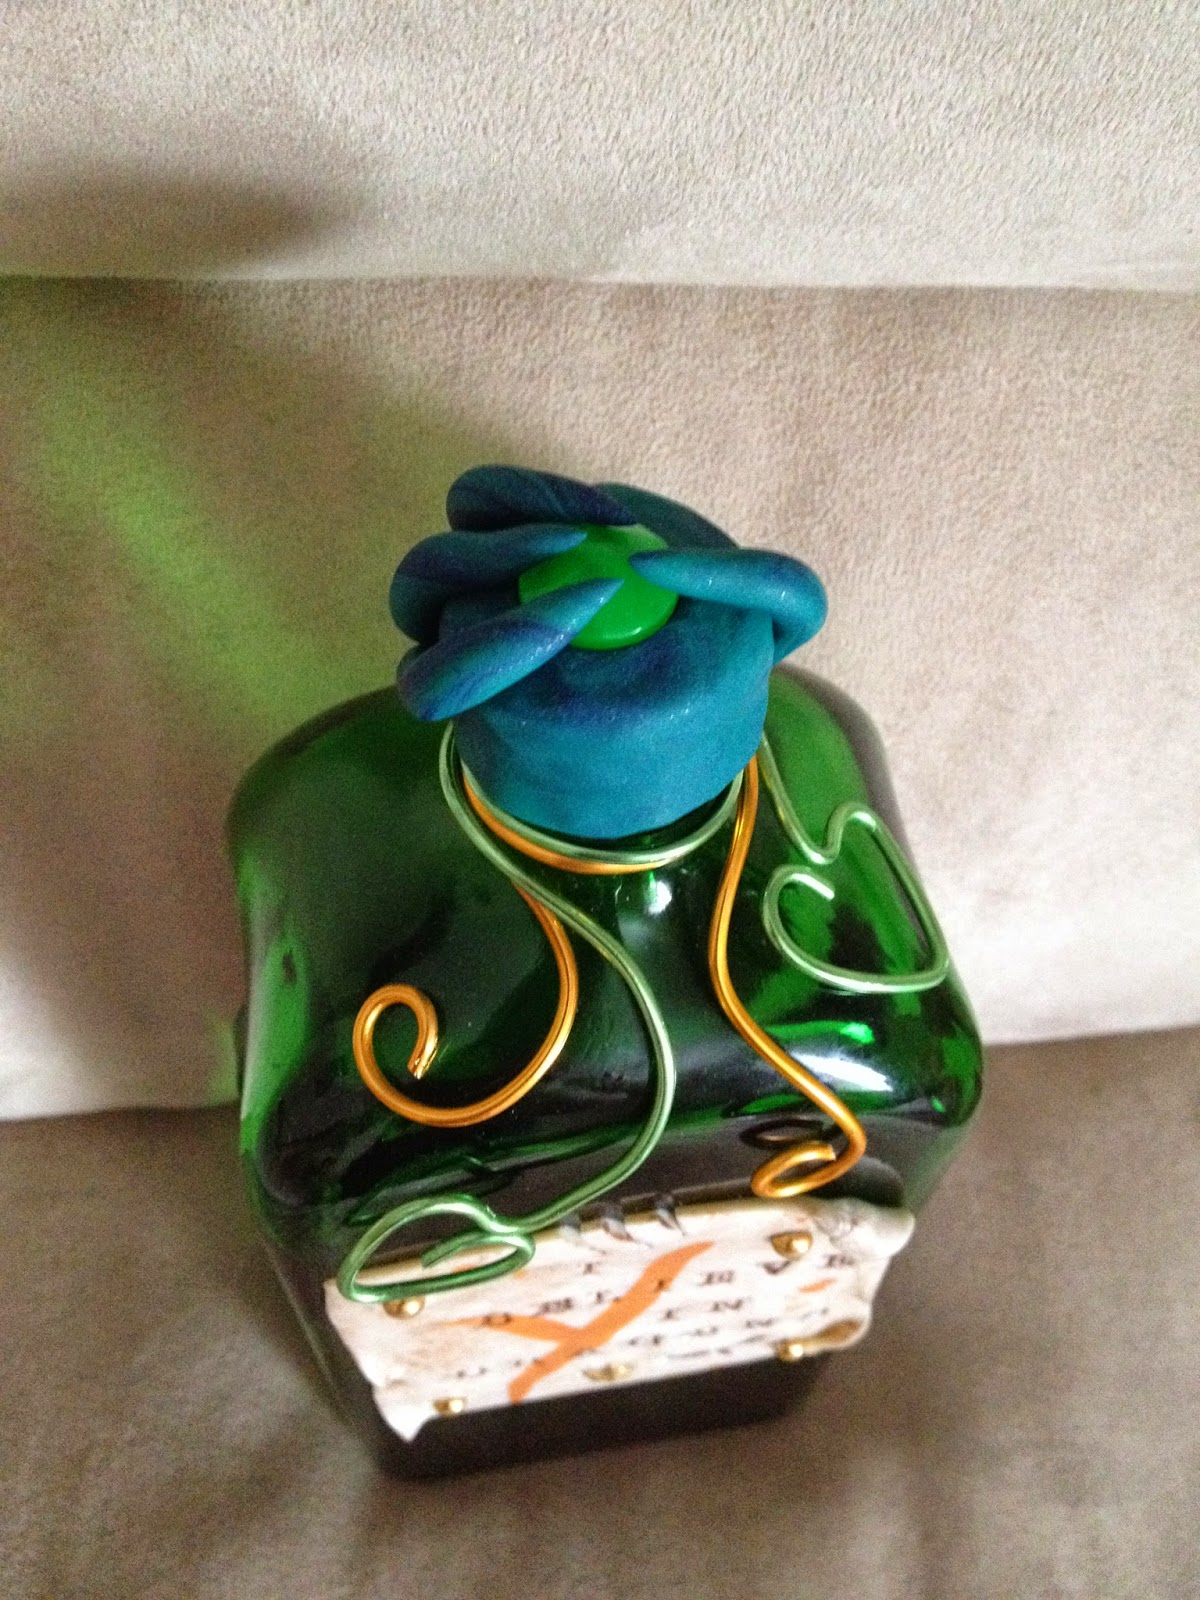
While walking last summer I found an interesting green liquor bottle. It was too pretty to take to the recycling depot so I kept it for a craft project. Here is what some polymer clay, floral wire, charms, and acrylic paint turned it into:
I started with a blended cane of polymer clay and cut it into equal sections, removing every second one and keeping both piles in order, so I could do both sides of the bottle the same.
I started at the bottom of one side, pressing the little cylinders I had cut into teardrop (dragon scale) shapes and beginning to layer/stagger them.
Next I made the "label" for the front of the bottle, mixing a couple colors of clay and rolling it smooth, then distressing it. I used rubber stamps to do the letters and added the embellishments by pressing them right into the soft clay. After baking the bottle to harden the clay, I rubbed some brown acrylic paint over the label and allowed it to pool in the indented areas while wiping it away from the smooth parts.
For the bottle cap, I covered the entire cap with a thin layer of clay, making sure that it covered all the metal but not letting it extend too far below the cap, so the bottle can still open. I pressed a plastic gem into the center of the top, then added the four "claws" to hold it in place. Thanks to the fact that polymer clay is baked at such a low level, the plastic gem was not damaged by the heat from the oven.
After baking, I used two colors of floral wire to decorate around the bottle neck.
I also added a little dragonfly brad to one side before baking the clay.