Wondering what to do with all that leftover Halloween candy? Here's a fun little project that will take care of that for you: a pony pinata. This technique can be adapted to make other shapes and animals too.
As I've said before, pinatas are great at birthday parties. Kids love them and adults get the enjoyment of watching the kids bash them and collect the goodies. My niece's birthday is coming up soon, so I'm making this pinata as part of her birthday gift from me. As long as you use candy that will last, pinatas can be made well ahead of time.
Pinatas are also a lot of fun at other events where kids will be present. They are both a fun activity and a great way to give candy and small toys/items. Add a real "bang" to your New Years Eve celebration, some genuine Mexican flair to a Cinqo de Mayo (May 5th) bash, or some extra "pop" to a family reunion.
MATERIALS
- cardboard
- tissue paper
- string
- marker or pencil
- scissors, exacto knife
- glue gun, sticks
- white glue
- candy, toys, hair accessories, other goodies for inside the pinata
1. Decide on the shape and draw it on a piece of cardboard. Keep the lines fairly straight and the design simple.
2. Cut out the shape. Flip it over and trace around it on another piece of cardboard. Cut out the second piece.
3. Cut a bunch of strips of cardboard. Mine were 3" wide.
4. Use the glue gun to glue the strips vertically along the edges of the pony shape. I didn't do the ear.
5. Fill the pinata with goodies.
6. Cut a bunch of tissue paper strips approximately 2" wide.
7. Snip along one side of the strips approximately 1" deep with approximately 1" spacing. This creates a "fringe".
8. Starting with the stomach and bottoms of the feet, white glue the non-fringed edge of the tissue paper strips to the pinata.
9. Continue working from the bottom towards the top, overlapping the strips about 1".
10. Continue until you have the entire pinata covered.
11. I added some strips to the back end the look like a tail.
12. Carefully poke holes through both sides of the pinata centered along the back at approximately 1" down from the top edge.
13. Cut a 6' piece of string and feed it through the holes. I used a piece of wire to do this. Tie the ends of the string together. I also tied another knot about 6" up from the pinata.
DONE! Have fun watching the kids smash all your hard work. ;-)
Pinatas are a lot of fun at parties and they are an easy way to thank your guests for attending without doing individual treat bags. Unlike individual bags, it doesn't matter if guests cancel at the last minute or arrive unexpectedly, because the treats are simply divided among whoever is present.
Pinatas are also very versatile: you can make them any size and shape you want and the contents are easy to customize to your theme and preferences. You can fill them with your child's favorite candies, opt for healthier options such as fruit snacks and granola bars, or skip the food all together and use small toys, erasers, stickers, etc.
This tutorial is for a triceratops pinata, but you can definitely use the basic techniques to customize it to whatever animal you want. By adding or removing elements, changing the colors, and using your imagination a little, this could easily become a cow or elephant or dog pinata. And remember, the best part about a pinata is the smashing, so don't worry about trying to be perfect.
MATERIALS
- BODY: cardboard box around 12"x10"x8" (30 cm x 25 cm x 20 cm)
- HEAD: cardboard box around 4" cubed (10 cm)
- FRILL, HORNS, TAIL: cardboard pieces
- LEGS: cardboard tube(s)
- white glue
- scissors, exacto knife
- acrylic paint, brush
- 3-4 sheets of tissue paper
- tape
- string
- treats
1. Turn the large box upside down (opening to the bottom). Poke a hole in both sides near the top edge in the center of the edge. Thread approximately 6' (2 m) string through both holes and tie the ends together. This is how your pinata will hang. (I completely forgot to do this until the end and used a long stick to thread the string through the box.)
2. Turn the box over and fill it with treats. Glue the opening shut just enough that it will stay sealed but still be the weakest part of the box (so the treats will fall out). If you want the pinata to be a "pull-type", poke holes in these flaps and add long strings to them before closing the box. Turn the box upside down again, so that the opening you just sealed is now the bottom of the pinata.
3. Cut a piece of cardboard to make a frill approximately the same size as one end of the large box. I had a thick piece of cardboard that was already the right size and a cool shape. You can make yours as simple or elaborate as you want - basically a wavy-edged oval is the shape you're going for. Once you have it cut out, trace the small box onto the frill along the bottom edge and cut out the square.
4. Glue and tape the small box to one end of the large box.
5. Glue the frill to the large box, fitting it around the small box.
6. On a piece of cardboard, measure and mark out six triangles that are 6" (15 cm) long and 2" (5 cm) wide.
Draw a diamond on cardboard approximately 3" (7.5 cm) high by 2" (5 cm) wide.
Cut out all the pieces.
The diamond is the nose horn. Glue/tape it in place with half on the small box and the other half sticking up.
Two large triangles are the eyebrow horns.
Four large triangles are the tail. Glue/tape them together.
7. Cut narrow slots into the frill above the small box for the two large horn triangles to slip in. Glue them in place.
8. Glue/tape the tail to the opposite end.
9. Cut the cardboard tube(s) into four pieces around 4" (10 cm) long.
Glue/tape to the bottom of the large box.
10. Stand the pinata on the legs (tubes).
Allow all the glue to dry thoroughly.
Paint the entire pinata whatever color(s) you want. Allow the paint to dry thoroughly.
11. Cut the tissue paper into long strips that are 2" (5 cm) wide. Snip along one side of the strips approximately 1" (2.5 cm) deep and 3/4" (2 cm) apart. (I used binder clips to hold my strips together and snipped lots at once.)
12. Starting at the bottom of the pinata, glue the uncut side of the strips to the pinata, overlapping as you go.
13. Work your way around the pinata, gluing on strips from bottom to top. You can use different colors for different parts or leave some parts bare. (I left the legs bare for now so that it's easier to store the pinata until I need it, but I might cover them later.) For the frill, start at the outside edge and work your way in. DONE.
My son loves the TV show "Rescue Bots" and has requested a "Transformers" birthday party this year. After some inspiration from Pinterest, I took on the ambitious project of building a helicopter pinata that looked like the character "Blades".

Materials
- images of "Blades" for reference
- balloon
- strips of newspaper/flyers
- lots of white glue (or a mixture of 1 part warm water, 1 part flour)
- two bowls/dishes (one for the glue, one for balancing the balloon while you cover it)
- tissue paper: white, orange, blue
- strong string
- candy (individually wrapped), small toys, etc. for filling pinata
- foam core board or sturdy cardboard
- acrylic paint: white, orange, blue
- optional: printed "Rescue Bots" logo, other metallic decal/stickers
- optional: orange plastic bottle lid
1. Inflate the balloon until it is firm but not so much that it might pop. Ensure it is tied tightly. Prepare to get messy (cover your work surface with plastic or newspaper if you like). Put some glue in one dish and balance the balloon in the other. Dip the newspaper strips into the glue and remove the excess with your fingers. Lay the strips onto the balloon, overlapping slightly. Keep them as smooth as possible. Cover as much of the balloon as possible with the first layer. I let each layer dry in between but some tutorials recommend just doing all the layers at once and then letting the whole thing dry for a longer time - your choice. I did 6 layers, alternating the direction of the strips with each layer. Once the balloon is covered with all the layers and is dry, you should just have a small hole around the end of the balloon. If the balloon hasn't already began to deflate on its own, puncture it with a pin or needle and allow it to slowly deflate. Remove the deflated balloon. Sections of the pinata may be pulled inwards by the balloon if it is stuck to the glue - use a pencil, ruler or stick to push the section back out.

2. Paint the entire pinata white. Use a pencil to lightly mark the areas that will be orange (the top 1/4 of the balloon, when on its side) and blue (WINDSHIELD: the front half of the balloon, far end from the opening). Paint these areas orange and blue. Allow all the paint to dry. Do a second coat if necessary.

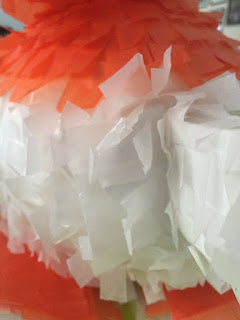
3. Cut two inch strips of tissue paper (all three colors), snip along one long edge approximately every 1/2 inch and about 1 inch deep. You can snip several strips at once. Don't worry about precision. Starting at the back of the balloon (hole end), glue the strips of white tissue paper with the fringe edge towards the back (hole end), from just over the edge of the orange on one side around to the other. Overlap the strips approximately 1 inch, working your way towards the front of the balloon. Make sure you don't use too much glue and leave the fringe edge loose. Cover all the area you painted white and put one row of white over the blue. Continue with the blue tissue paper until you have all the blue covered and one strip over the front of the orange. Proceed to cover the orange area with the orange tissue paper strips in circles from the blue/white up to the center of the top.

4. Carefully poke two small holes approximately 1.5 inches on either side of the very top of the pinata. Thread a three-foot (1 meter) long string through (I used a stiff wire to guide it). I put a circle of white foam core board covered in white tissue paper on the top of the pinata, between the holes. (Cardboard will work too. Paint it white before applying the tissue paper.)

5. PROPELLER: Cut two long strips of foam core board or cardboard the same size (approximately 2 feet long and 3 inches wide). Glue them together. Once the glue is dry, paint them orange. Once the paint is dry, cover the entire thing with orange tissue paper strips. Once it's dry, poke a small hole in the exact center. Thread both ends of the string from the top of the pinata through this hole. Poke/drill a hole through the orange bottle lid and thread both ends of the string through it. Tie a large knot to secure the strip of foam core board/cardboard and lid down to the top of the pinata. (You can skip the lid or use a different color lid.)

6. Glue a "Rescue Bots" logo on the blue near the front underside of the pinata (optional). FLOATS: On the bottom of the pinata, poke two small holes approximately three inches on either side of the center. Cut 8 strips of foam core board or cardboard (paint white) about 1 foot long and 3 inches wide. Glue them together as two sets of four. Paint the top side orange.Cover the sides/edges with white tissue paper strips (hanging down). Cover the top with orange tissue paper strips. Once dry, poke a small hole in the exact center of each.


7. Thread the ends of the string from the bottom of the pinata through these holes (orange side towards the pinata). Tie large knots in the ends of the string to secure the pieces of foam core board/cardboard to the bottom of the pinata. Trim away the excess string.


8. Poke a small hole on either side of the hole at the back end of the pinata. Fill the pinata with candy, toys, etc.

9. Use some scraps of foam core board/cardboard that will fit through the hole. Poke holes through them and thread a foot-long piece of string through them. Put this assembly inside and pull the string ends through the holes in the pinata. (See picture.)

10. TAIL: Build a tail out of three layers of foam core board/card board (painted white), referring to pictures of "Blades". Make the end that will be attached to the pinata the same size as your hole. (You may have to trim the hole bigger for the tail to be strong enough and the right scale.) Paint the orange areas orange. Cover with white and orange tissue paper strips. Add the circular parts, covered in white tissue paper. Once assembled and dry, poke a small hole through approximately 3/4 inches from the end that will attach to the pinata. Thread one end of the string from the back end of the pinata through the hole. Apply glue to the edge/end of the tail and poke it inside the hole against your scrap assembly inside. Tie the ends of the string together tightly, pulling everything together to secure it. Add stickers to the center of the circles on the tail if you want.

11. Fill in around the tail with half-circles of foam core board/cardboard (painted white) and white tissue paper, covering the hole and the string/knot.

12. DONE! Whew! This took me a long time to assemble. Take your time, refer to your pictures of "Blades" often, and use longer strings than you think you need.
NOTE: If your kid(s) want to help, depending on their age(s), they can fill the pinata with candy or perform any of the other steps that you feel they are able to, but be cautious about having them poke the holes or doing other cutting.
Also, you can alter the color scheme, logos, and tail design however you want and build any other kind of helicopter using this method. The key is reference photos so that you end up with something that looks like what you had in mind.


