Inspired by the Canadian curling and hockey teams gold medals (both men's and women's), as well as all our athletes and medalists, I present gold medal cupcakes! Start with red velvet cupcakes and top them with white icing. Then add two blue stripes and an upside down butterscotch chip to create the medal. DONE.
coconut, tinted green with food coloring (or you can use green icing and a ruffle icing tip)
sesame seeds (optional)
1. Carefully peel back the papers on your cupcakes and cut them all in half horizontally, so there is a top and a bottom. Set the tops of the whites aside (don't stack them too much) and the bottoms of the chocolates, which will not be used in this project. 2. Set the bottoms of the whites out so you can access them all. Draw a square of orange icing on each one, allowing the corners to stick out over the edge of the cupcake. You can fill in the square if you want to.
3. Next add the green coconut or icing.
4. Then carefully lay on the tops of the chocolate cupcakes.
5. Squiggle on some yellow icing.
6. Then squiggle on some red icing. You can add some in the center if you like.
7. Add the tops of the white cupcakes. Sprinkle the tops with sesame seeds if desired. Use long toothpicks or skewers poked through the cupcakes if they are leaning too much. DONE.
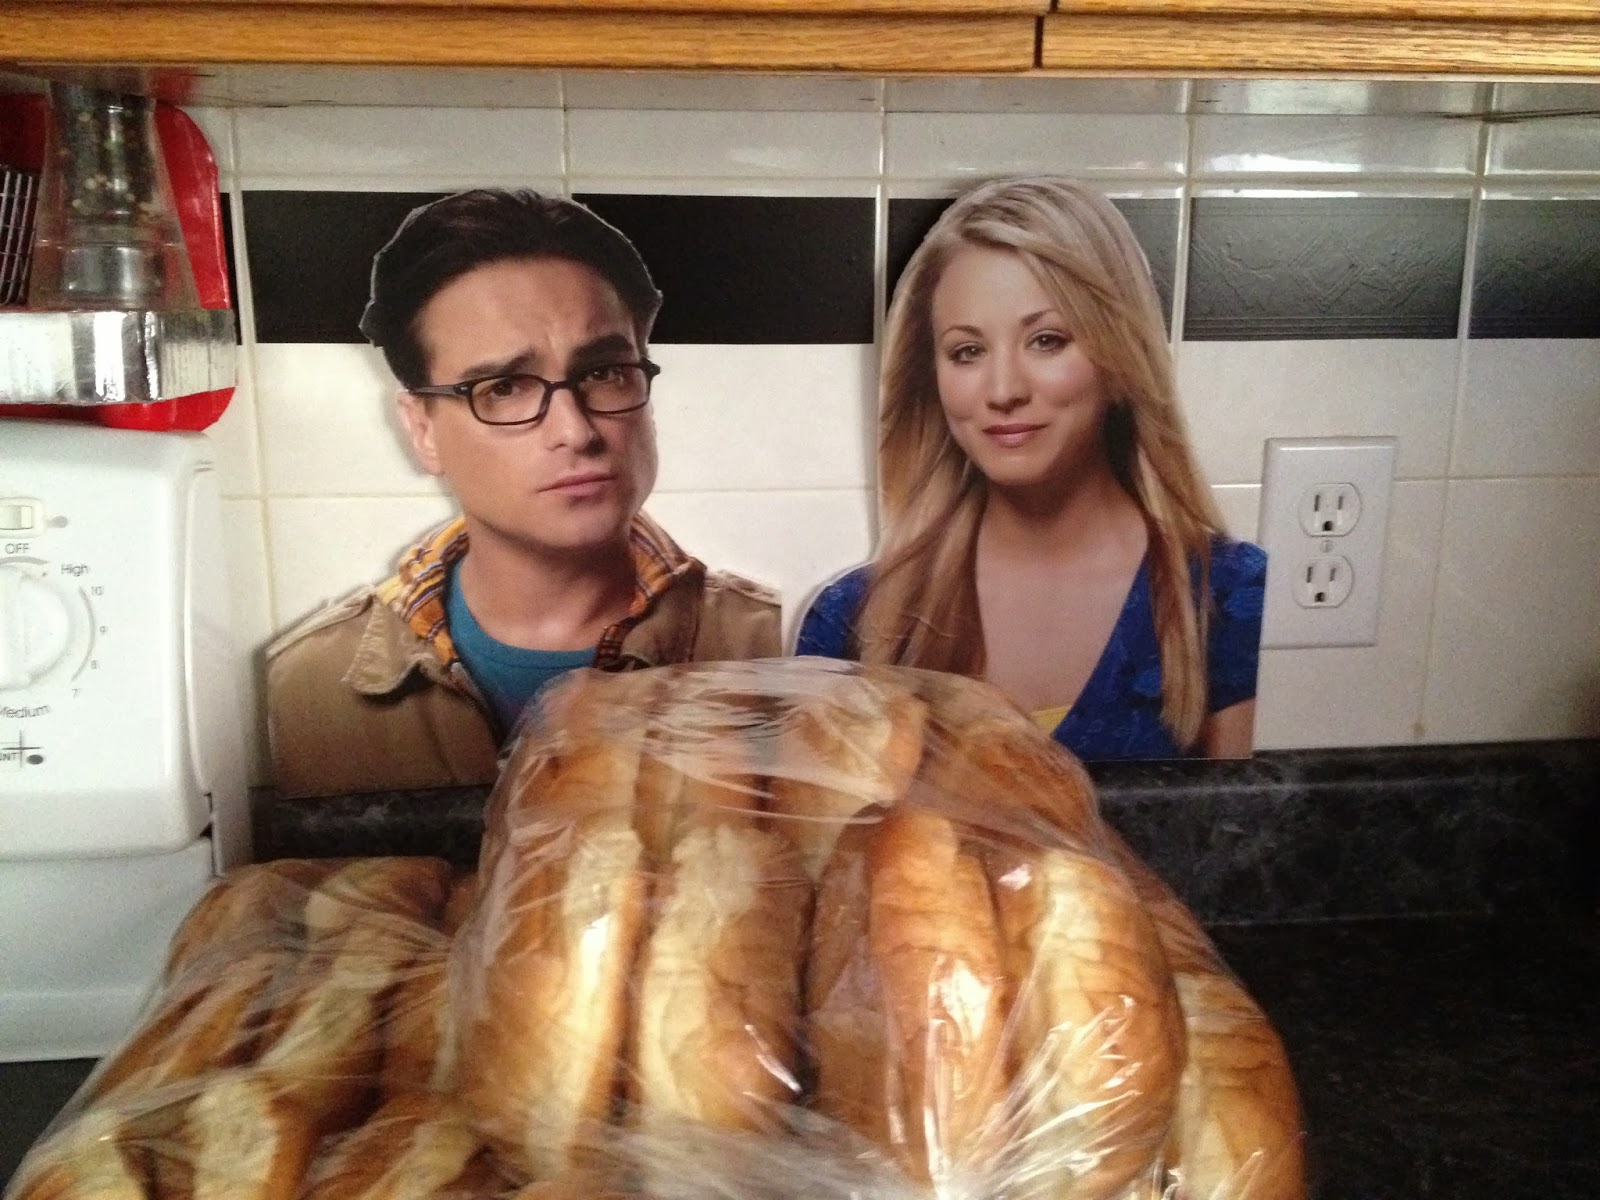
Our whole household loves "The Big Bang Theory" TV show, so it seemed a natural fit for a theme for our little guy's second birthday. This theme easily translates to any age group - just change up the activities/games and treat bag contents (if you decide to do treat bags). You can find examples online of parties for everyone from kids to adults. For decorating, I went with stuff that Sheldon and Leonard would have in their apartment, including:
their apartment flag (gold lion on a blue field)
a telescope
science magazines
periodic table of elements shower curtain (which I made using a large printed periodic table that I stuck onto a cheap, white shower curtain liner using packing tape)
a poster board version of their blue apartment door, number 4A
a poster board "friendship algorithm" white board
a Rubik's cube tissue box holder, which I made from colored cardstock paper
a Batman cookie jar, which I modeled from cardboard over a food-safe tin, then painted
vintage posters
a dart board on the back of the front door
tonnes of comic book and sci fi movie props and toys, like lightsabers, figurines, and masks
printed large photos of the characters, mounted on foam core board
bright, primary colors for plates, utensils, and napkins (with printed lightsaber napkin rings)
Menu
BBQ bacon cheese burgers, with BBQ, bacon, and cheese on the side
french fries
mini hamburger cupcakes (I will post a tutorial soon)
Froot Loops bars (Rice Krispie squares recipe, with Froot Loops substituted, since Howard's astronaut nickname is "Froot Loops")
"nightlight" goldfish crackers
Gobstopper candy "ball pit"
make your own sundae bar
cheesecake, decorated like the end of the opening credits (I cheated and used black marker on the cling wrap to do the lettering)
bottled water with custom labels
Sheldon's long island iced tea - for defending your woman
For my husband's recent birthday, I went with a camo theme, decorating with some store-bought camo party supplies, a roll of camo wrapping paper, and a few military themed items from his collection. I didn't want to focus too much on either armed forces or hunting, as my husband loves them both, so I stuck mostly to just camo, brown, green, and a shot of orange. A few highlights: - camo cupcakes - camo ice cream - camo party accessories including plates, napkins, and table cloth - camo wrapping paper wrapped around bottles of water and ginger ale - pretzel sticks and mint gummy candy leaves displayed in jars - orange snacks like cheddar cheese, cheesies, and cheese nachos
CUPCAKES
For the cupcakes, I mixed up a white cake mix and a chocolate cake mix, then divided the batter into four bowls: 1. plain chocolate = dark brown 2. plain white with green food coloring added = green 3. mostly chocolate with some white = light brown 4. mostly white with some chocolate = beige
I then dropped the different colors into the cupcake papers randomly in different sized and shaped drops.
After they were baked, I made up brown (chocolate) icing and green icing and put both into an icing bag to decorate them.
ICE CREAM
First, I tinted some slightly melted vanilla ice cream with green food coloring.
Then I randomly dropped the green and chocolate ice creams into my container.
Once I was done, I put it back in the freezer to harden.
My friend loves sunflowers, so for her birthday I decorated a bunch of cupcakes to look like sunflowers. MATERIALS - cupcakes - yellow icing - chocolate "kisses" or Oreos - chocolate chips and red icing OR red candies and chocolate/black icing - chocolate icing (optional)
1. After baking the cupcakes, stick a chocolate kiss upside down into the center. This will be the center of the flower. If you prefer to use an Oreo, you'll want to stick it down with icing.
2. Using a flat decorating tip, apply the yellow icing in stripes out from the chocolate center to form petals.
3. Stick a chocolate chip upside down into the yellow petals and add a red dot of icing, half on top of the chip and half off (or put a dot of chocolate icing and stick a red candy to it). Add accents with chocolate icing, like spots on the ladybug and seeds around the center of the flower. DONE.
My husband loves the mountains, cake, and ice cream, so for his birthday I made him this cake.
MATERIALS:
- 2 cake pans that are the same size
- cake mix or ingredients
- ice cream
- icing: white, dark green, light green, yellow
- large chunks of chocolate
- baking and decorating supplies
1. Bake the cake and let it cool.
2. Leave the ice cream out for about 20 minutes so it's just a bit soft. Spoon some into a cake pan the same size as your cake and smooth it as much as you can. Refreeze it for several hours.
3. Slice the cake in half horizontally and carefully remove the top half. I flipped it onto a plate. Use a flipper to lift the ice cream out of the pan and place it onto the bottom half of the cake. Replace the top half. Cover with plastic wrap or tin foil and put back in the freezer until you are ready to do the decorating.
4. Prepare the icing and decorating materials. Break up the chocolate into rough chunks that look like rocks.
5. Work quickly so the ice cream doesn't get too soft. Spread some light green icing on the entire top of the cake, with lots in the middle. Stick your chunks of chocolate into this icing in a rough line across the cake. Use a star tip to make dark green icing trees around and between the chunks of chocolate. Add more little chunks of chocolate around the trees. Spread yellow icing around the rest of the cake, leaving a little light green border around the trees/mountains and drag a fork through it to create rows so it looks like fields. Add a few blobs of white icing on the tops of the chocolate chunks to look like snow.
6. Use toothpicks to keep the plastic wrap or tin foil from sticking to the icing and put the cake back in the freezer until just before you want to serve it. DONE.
Even though my team didn't make the playoffs this year, there's always next year. Until then, I can still dream about the Stanley Cup party I'll throw, and I'll share my ideas with you in case your team is still in the running (or you'd like to dream about next season too).
Serving bowls: silver like the Cup Platters/trays: glass to look like ice Coasters: pucks or circles of black felt/foam
For decorations, use temporary hooks, like 3M Command hooks, and coat hangers to display jerseys, banners, and flags on your walls. Add your team's logo to things with stickers or print it out and glue or tape it on. Ribbon can also be tied around things to add color.
You can label cups or wine glasses with player names/numbers so that guests can tell them apart. You can also cover or replace the labels on bottles to look like jerseys.
For activities and games, I recommend keeping actual hockey or street hockey OUTSIDE to avoid damaging things in your house. Air/table hockey would be appropriate, and there are lots of hockey trivia games and NHL themed board games like Monopoly.
Many things are available in your team colors: table cloths, napkins, plates, cups, streamers, drinks, Jello, icing for cookies/cupcakes, candies... For other snacks/flavors, I've been thinking by color:
Red - strawberries - raspberries - red licorice - salsa - watermelon - tomatoes - red delicious apples - garlic sausage, pepperoni sticks - cherries - cranberry - ketchup chips
There are a tonne of "recipes" for these on the internet, so I'm not going to go into great detail on these cute little treats, but I had fun making them and wanted to share them. Basically you melt some chocolate (in a double boiler or in the microwave) and use it to stick an unwrapped chocolate "kiss" onto a small cookie, then to stick a chocolate chip on the other side of the cookie, and voila - tasty little acorns!
If your Valentine is addicted to the game Angry Birds like mine is, here's a fun treat to whip up for him/her. I chose the red bird and used pictures off the internet for reference.
MATERIALS: - cake mix and required ingredients or your favorite cake recipe and the ingredients - oven, mixer, pans, bowls, measuring cups, etc. - icing (canned, mix, recipe, whatever) in the following colors:
white
green
red (use food coloring paste OR liquid coloring and cocoa powder OR red Jello power)
brown (chocolate OR add cocoa powder to white) OR black
- butterscotch or peanut butter baking chips - toothpicks - a piece of styrofoam or florist foam - icing bags and tips OR small plastic bags - spherical candies (mine were sour cherry but gumballs or others would work, it's the shape and color you're worried about); you need at least one per cupcake
1. Make and bake your cupcakes. I used a chocolate fudge cake mix that made 24. I put some baking chips in with the batter. You can start on the next step while they are baking.
2. Stick a toothpick into each of your candies, then stick the other end of the toothpick into the foam. This is so they don't roll around while you decorate them.
3. Apply a circle of white icing to the lower front of the candy. Stick a baking chip (beak) onto the icing at the top of this circle. I iced 5 then stuck on the chips, then did the next 5, and so on.
4. Add two small dots of white icing (eyes) to each candy just above your baking chip beak.
5. Using your chocolate/black icing, draw a V over the eyes for eyebrows. Make sure they look angry. Dot a tiny bit of chocolate/black icing onto each white eye to make a pupil.
6. Blob some red icing on the top of the candy to make feathers.
7. I put my birds in the fridge while I waited for my cupcakes to cool. Once the cupcakes are cool, retrieve your birds. Apply green icing to the tops of your cupcakes. I did mine with a knife but you can use your decorating bags/tips if you want. It should be a bit messy as it's supposed to look like grass.
8. Stick your birds in the green icing.
9. DONE! Clean up all the evidence and hide your creations until the perfect moment to surprise your Valentine.