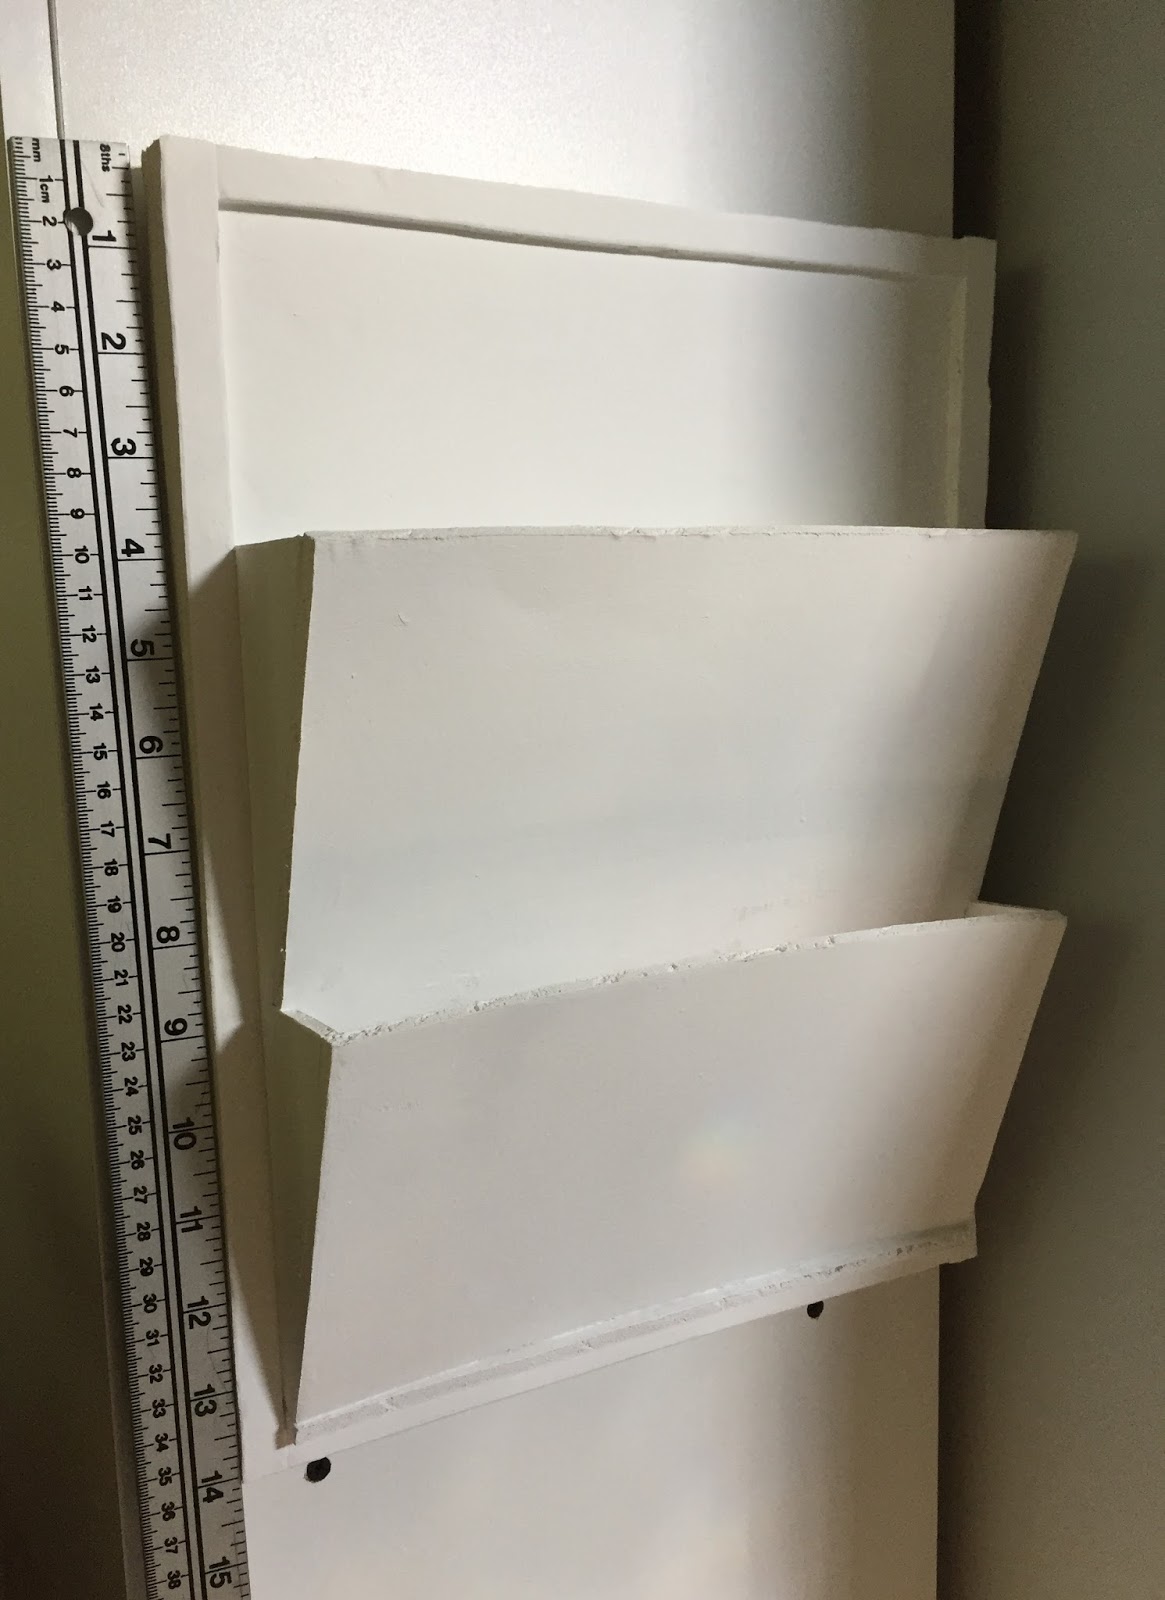
In an attempt to organize our kitchen a little better, I designed and built a wall mounted file organizer. I had looked at buying one, but couldn't find anything that fit my needs and the space where I wanted to put it. I wanted to mount it on the side of a cabinet, so I also wanted the organizer to be light weight so that I could use 3M strips to attach it, rather than screws or nails. I used foam core board, but you could use cardboard. You could also use thin wood if you want to get really fancy.
MATERIALS
- foam core board
- white glue
- ruler, pencil
- exacto knife
- acrylic paint, brush
1. Determine what size you want to make your organizer and how many "pockets" you want it to have. I wanted a letter-size piece of paper to fit "landscape" in both pockets. I chose two pockets: one for papers to be filed and one for papers to go out (letters to be mailed, coupons, etc.).
The base of my organizer is 11" wide by 14" high. I started with two pieces of foam board this size and glued one on top of the other to make a base two boards thick.
I glued 1/2" strips of foam board all the way around the front edge of my base.
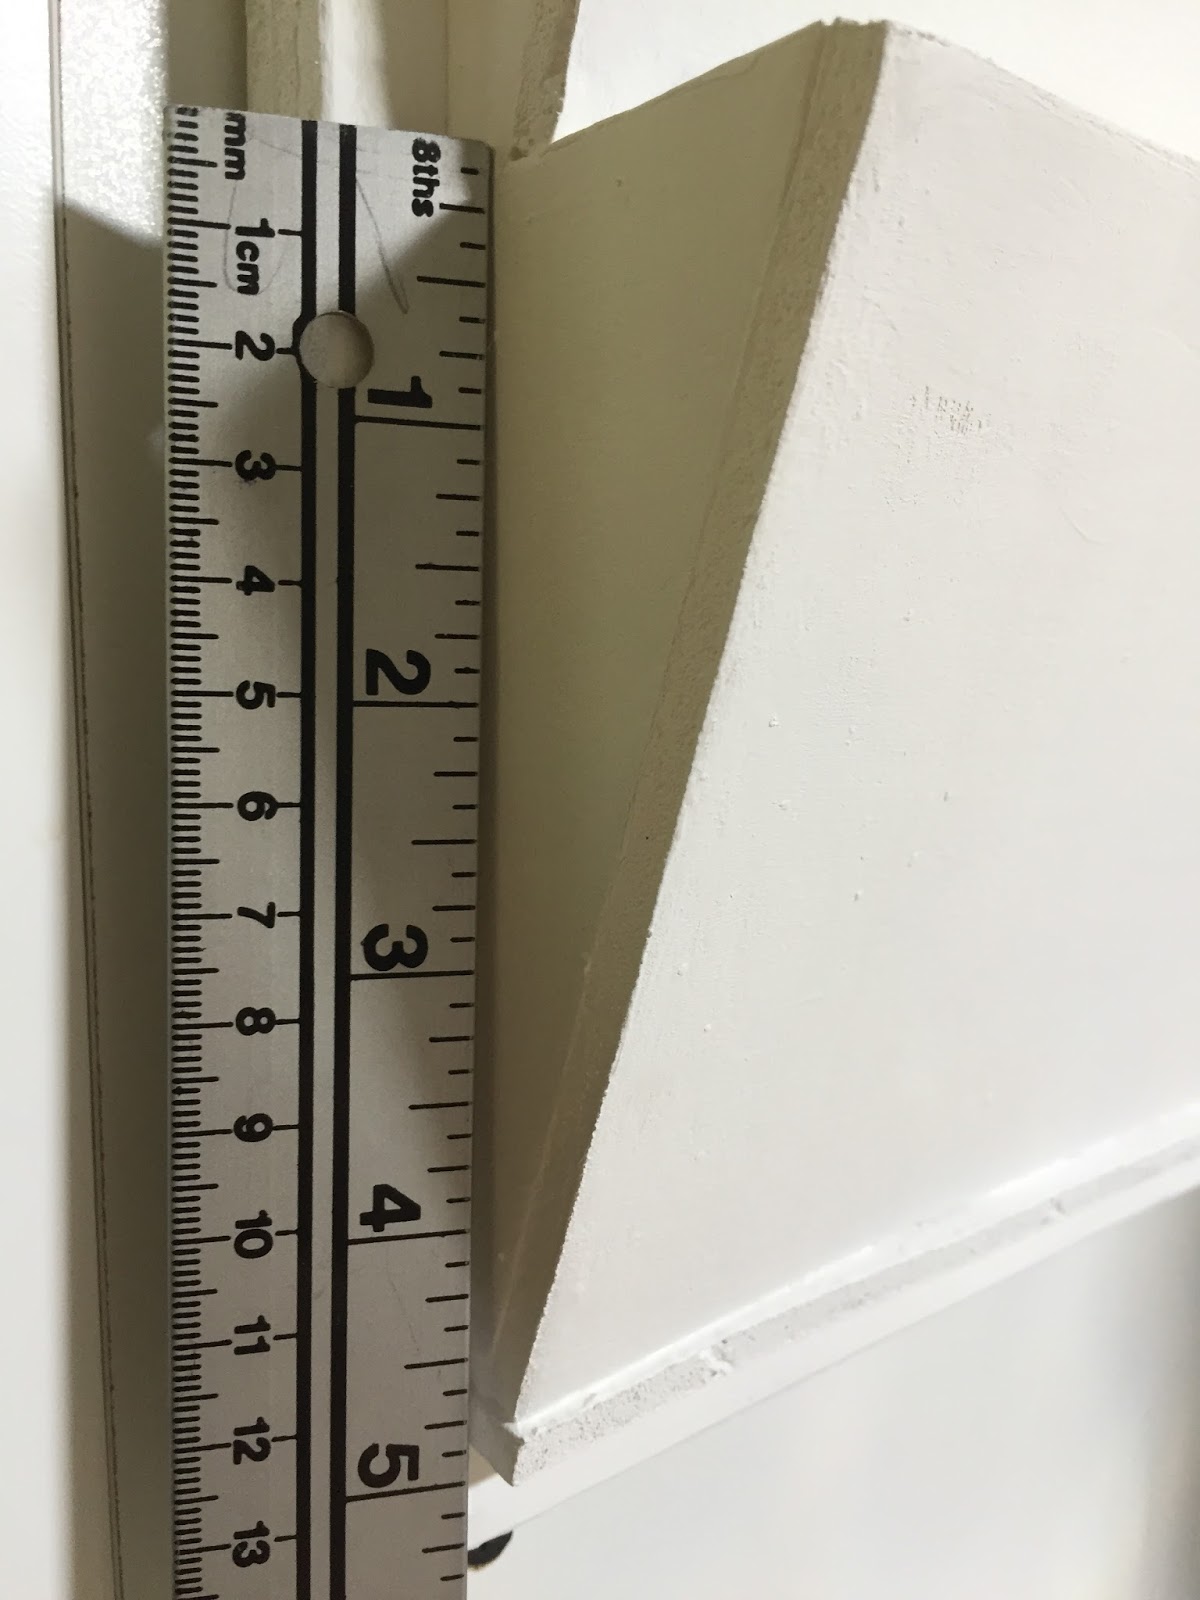
2. Decide how deep you want the pockets to be. On my organizer, the bottom pocket is 4.5" deep and the top one is 5" plus it extends down inside the bottom pocket a bit.
I made the top opening of my pockets 2" from the back/base.
Draw out your side pieces so they look like two overlapping right-angle triangles. Measure the lengths of the two angled edges - these measurements will be the height of your front pieces. My front pieces are 10" wide.
3. Hold one side piece in place and mark on the top pocket front where you need to notch it so that the bottom edge of it will fit down inside the bottom pocket. Mark the opposite side of the front in the same place. Double check, then trim away the two notches.
Test-fit the pieces and make any necessary adjustments.
4. I glued a 1/2" strip on edge across the bottom of where my bottom pocket sits because I had a bit if a gap there when I test-fit the pieces.
Glue the side pieces in place. Use the fronts to ensure that you have them at 90 degrees to the back/base.
I used some more 1/2" strips inside the pockets to make the sides sturdier and ensure there weren't any gaps at the bottoms.
Glue the fronts in place. Allow all glue to dry thoroughly.
5. Paint and decorate the organizer however you please. Label your pockets, if you want to.
(The paint warped my fronts a bit, but I don't mind.)
DONE.
What fun ways did you decorate yours? Chalk paint? Your last name? An inspirational quote? Did you label the pockets with your family members' names? I haven't decide what else to do on mine so it's still just boring and white.
We have a wooden corner unit in our basement that has these triangular shelves on both sides. They're great for displaying things but I wanted to add some closed storage to the lower shelves, so I had to design some custom boxes.
Once you figure out the angle, which isn't difficult, it's actually pretty easy to make the boxes. I covered mine with wrapping paper but you can decorate yours however you choose.
MATERIALS
- cardboard box approximately the same size as the shelf
- flat cardboard pieces
- paper
- exacto knife, scissors
- ruler, pencil
- glue gun, glue sticks
1. Place a regular piece of paper on the shelf with one edge tight against the side. Bend the opposite side up so that you can press the paper tightly into the corner. Fold the paper firmly so that the folded edge is tight against the side of the shelf. This will be your template for creating the box.
2. Cut the top flaps off a cardboard box (and cut shorter than your shelf space, if necessary). Place it upside down on your work surface. Put your template UPSIDE DOWN on the bottom of the box with the 90 degree angle against one corner. Trace your angle, using a ruler to make the line longer if necessary. Cut this line and down the sides of the box at both ends of the line.
NOTE: If you have other shelves that are exactly opposite the one you start with, you should be able to use the same template, just place it right side up on the bottom of the box instead.
3. Measure the angled edge of the box at the inside of the bottom of the box. This length will be the length of the side piece of cardboard, plus an inch or so for flaps on both ends (for gluing). Measure the inside height of the box. This will be the width of the side piece, plus an inch or so for a flap along the bottom (for gluing).
4. Inside the bottom of the box, trim the inside flap(s) back from the angled edge to make space for the gluing flap on the side piece. Glue down the inside flaps. Check the side piece for fit, adjust if necessary, and glue in place. I glued the bottom edge first, then one side, then the other.
If you don't want to make a lid, skip to decorating and using the box.
5. Place the box upside down on another piece of cardboard and trace around it. Use a ruler to draw lines about 1/8" outside of the traced line (for folding). Draw more lines an inch from these lines (or more if you want a deeper lid). Cut on these lines. Cut some of the ends to make small flaps (for gluing). Fold on the fold lines.
6. Check to make sure the lid will fit. Glue the small flaps to the insides of the lid edges to form the lid. I also taped the corners that I felt needed a bit of extra reinforcement.
DONE. Decorate/cover the box however you like, fill it up, and stick it on the shelf.
(No, your eyes aren't playing tricks on you - we painted the corner unit before I finished the boxes.)
I used sunflower yellow spray paint and wood-grain mactac to cover more of my floor vent covers, transforming them from this...
...to this.
I have this wonderful river rock flooring in my bathroom, but I couldn't stand the boring white floor vent cover, so I made it "disappear". Here's how I did it:
MATERIALS:
- camera
- printer and paper
- Mod Podge or white glue thinned with a little water
- spray paint that matches the main color in the flooring (optional)
- clear spray sealant
- exacto knife
1. Take a photo of the flooring where it repeats the same area as the spot where your vent cover is.
2. Print the photo on regular printer paper (mine took two sheets that I had to piece together) at the size you'll need to cover your vent cover plus wrap a bit around the edges. If you want to cover the "flap" below the grates, print a second copy.
3. If you want, spray paint the vent cover in a color that matches the flooring. This will ensure that all the edges are colored.
4. Put the vent cover in the vent and lay the printed photo on top so you can line it up with the pattern of the flooring. Stick the paper on with a small dot of glue or Mod Podge. Remove the vent cover and set it on some newspaper on your work surface (table, etc.).
5. Continue covering the front of the vent cover with Mod Podge and sticking down the photo. Wrap it around the edges and glue it to the underside.
6. Use the exacto knife to pierce the paper along the edges of the grates and Mod Podge these flaps of paper down to the grates. Flip the vent cover over to make it easier to see where you're applying the glue.
7. Trim the second photo to the right size and glue it to the "flap" below the grates.
8. Cover all of the paper with more Mod Podge. Spray it several times with clear sealant. DONE!
This is a great project for hockey fans who hate to see things go to waste.
MATERIALS:
- broken hockey sticks (I used 8 blades and 4 pieces of shaft)
- tools (saw, drill, sander)
- tape measure
- screws
- hockey tape, hockey stickers (optional)
1. Measure your space, collect the sticks, and draw up a plan of what you want the headboard to look like. An equal number of left and right blades is required to make both sides match. Keep in mind where the tips of the blades on the outside edges will be.
I used 4 left and 4 right blades in varied lengths spaced 2" - 3" apart and 4 shafts (2 at my maximum length, 2 shorter) spaced 1.5" apart. I also lined up one of my blades so that its shaft would be on a stud in the wall where I wanted to put my headboard.
2. Remove all tape/stickers/residue from the sticks and wash them. If you like the look of the tape on them, add clean tape after removing the old tape and washing the sticks - the old tape will be covered in dirt, sweat, bugs, and all sorts of other things you don't want in the bedroom. Be careful with the broken ends, as they can be sharp and could give you slivers.
3. Lay the sticks out according to your plan. I put the shafts in front of the blades. Mark where you need to cut off ends and drill holes in order to screw the shafts to the blades.
4. Trim the ends and sand them to prevent sharp edges and slivers. Drill holes in the pieces that are going on top/in front (in my case, the shafts). Lay them on top of the other pieces (blades) and mark where they need to be drilled. Drill them. Also drill holes for screwing the completed headboard to the wall.
5. Screw the pieces together. I used 1.25" screws.
6. OPTIONAL: Decorate the sticks with hockey tape and stickers. I also used tattoos, which provided a really neat effect. Wrap the ends of the sticks with hockey tape as added protection against sharp edges and slivers. You can also add more stickers later.
7. Attach your headboard to the wall. DONE!
Thanks to my Dad for all his help with this project and to Doug and Scott for the sticks.
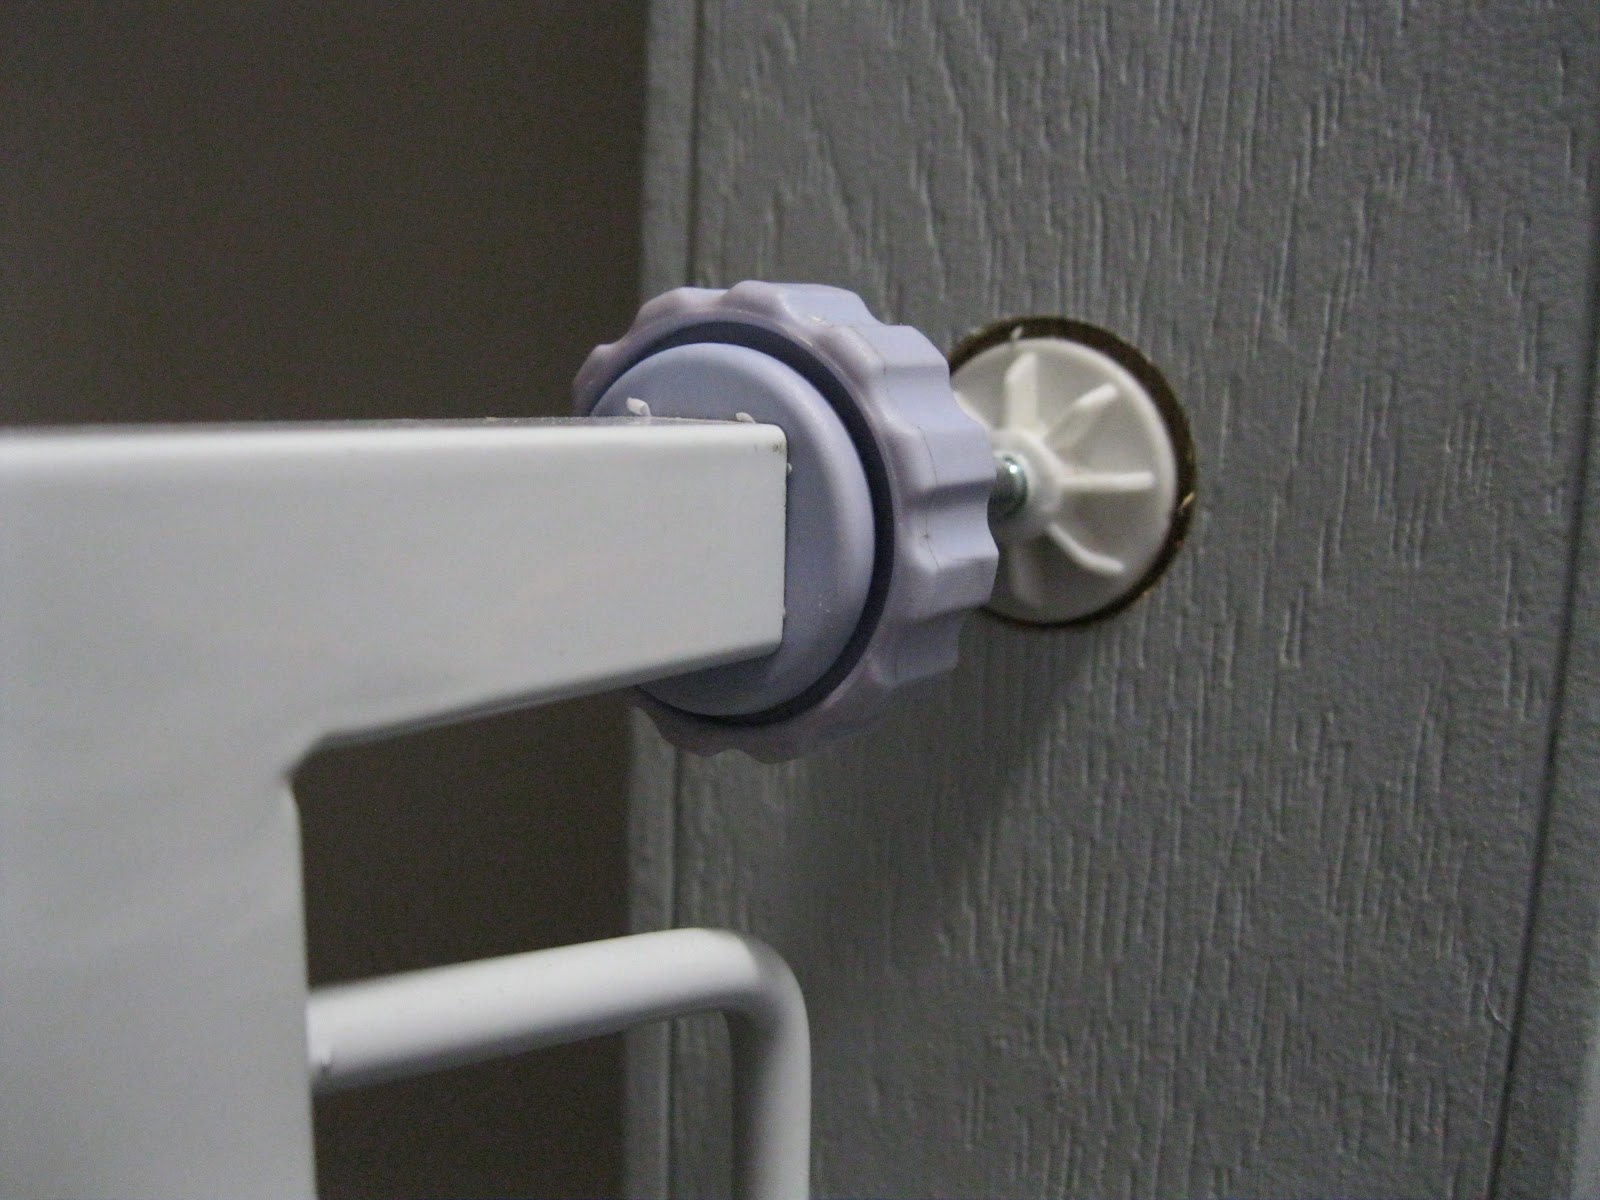
I say DIY, but I didn't do it myself and it really wasn't my idea, I was just insistent that there had to be a way to make our tension-style baby gate sturdier and kept bouncing ideas off people until my uncle came up with the best idea and my dad put it into effect for me.
This is for the type of baby gates that fit in a doorway with threaded rods on both sides that you tighten against the door frame. I couldn't get ours tight enough that I couldn't just grab it and tilt it, which left me fairly certain that if an adult was falling and reached for it to steady themselves, the gate would move and they would fall down the stairs.
Our solution was to use a drill bit that was slightly larger than the pads at the end of the threaded rods (not a hole-saw, a large drill bit) and drill into the door frame in the four spots where the ends of the rods touched. We put the gate in place first, leveled it and centered it, then traced around the pads, removed the gate, drilled, then replaced the gate and tightened the rods. DONE! No more movement in the gate, so no chance that the baby, the dog, or anyone can get (or fall) down the stairs without opening the gate. The only thing left is to paint inside the holes we drilled, but there's no rush on that. And if we ever want to remove the gate, a little drywall putty and paint will erase the holes.
Ever since I saw a tutorial for creating shelving out of cardboard on Instructables, I've been using the principles to create shelving and storage all over my house. Layered and/or interlocking pieces of cardboard - with the corrugations running vertically - are incredibly strong, yet light-weight, free, and easy to work with. All you need are some scissors, glue, tape, an exacto knife, and cardboard.
In the kitchen, above my stove to hold my spices, salt & pepper shakers, and toothpicks:
In the kitchen, two corner shelves with Coca-Cola bags as the tops/bottoms of the shelves:
Solving the wasted space/where to put the DVD player; covered in old comic book pages:
More comic book pages cover this one, which is screwed to the wall to support the weight of the movies:
A special yin-yang one for the baby's room, inspired by one on Instructables:
These shelves are so fun to make that I plan on making more - I'll post photos as I do.
(If that little heart didn't show up for you, sorry.)
I use 3M's Command strips and hooks for all sorts of things around my house. They come in such a wide variety and they don't damage your walls. I use the little clear hooks and the decorating clips for hanging my jewelry (rings, necklaces, bracelets), wall-hangings, and other decorations, and I use the picture hanging strips (they are like Velcro) for hanging frames, bulletin boards, and some of the cardboard shelves I have created. The hooks are great for in the baby's room since I'll be able to move/remove them as required while the strips are great in the kitchen to attach things to the tiles. I also use the big hooks for hanging oven mitts, purses, bags, and the magazine rack in my bathroom, and a medium hook to hang my bottle brush by my kitchen sink. I even used the cord bundlers to hang my autographed hockey sticks in our sports bar - they won't damage the sticks and I wrapped them in hockey tape so they are practically invisible.

Now I just need them to invent a hook strong enough to hold up the Jolly Jumper...